Monday, July 19, 2021

Art Tag with lots of Carabelle Studios

Hello My Inky Friends, let's play with some vellum today! I love vellum and have been using it for years & years, so thought it was high time to pull some out today. Let's see what happens!!  **In case you have not heard Topflight is no longer participating in the affiliate program & my coupon code no longer works. Sorry about that. Luckily they have lots of good sales!

*Affiliate- some of these companies have given me product to use, play & experiment with. The ideas are my own but I tend to work with companies whose products I like so enjoy the inspiration.  **some of these links are affiliate, I receive a small percentage from the company at no cost to you. This helps me deliver free content!

Absolutely love this piece, it just makes me happy!! All the layers, some die cuts, inky goodness. Oh what shall I do with it? To see photos of the Topflight Stamp products used go here. The full supply list with links is below. 

This is what started this project, some Eileen Hull embossing powder & some printed vellum sheets. I really had no idea where I was going at this point. Sometimes that is all you need to get the creative juices flowing.  

The fabulous new On The Line stamps by Carabelle Studio were stamped using an embossing pad & the powder in Aqua Splash & White Wonder. The results were so dynamic more play was definitely needed.  

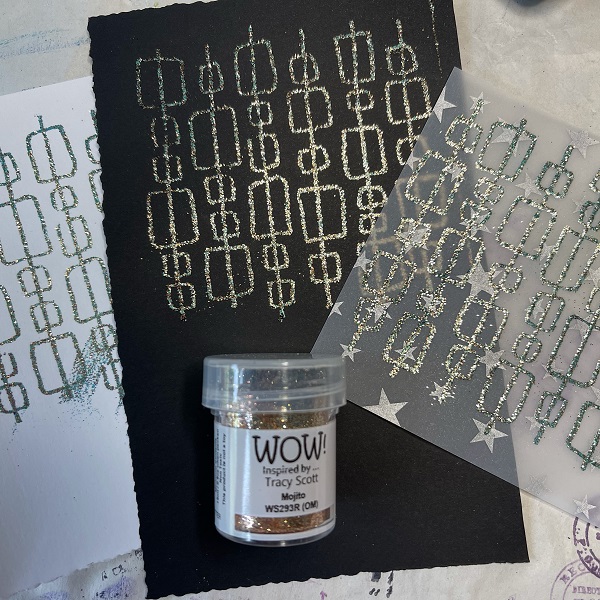
Next up was Tracy Scott's powder in Mojito by WOW. This powder packs a punch of color & glitter, it has a very patina look to it. It is part of the Fiesta Trio.

Definitely needed a back ground for this to land on. Just for something different I pulled out some 49th & Market ephemera packs I got ages ago. This could be fun!

Pulled some pieces together for an audition. 

Using other stamps from the On The Line set did some random stamping using Prism ink. Love the coverage of this ink!

I chose a focal image, also by Carabelle Studios called Pretty One. Love this girlie with wings. I wasn't sure if I was going to add wet color or not so Archival Ink was the way to go. Did you know there are 4 new Distress colors. Some of my favorites too I tried Black Soot, Vintage Photo & Ground Espresso.


I decided to add a bee tab from a previous post. It is from the postage stamp collection The Great Outdoors. To see other ways to use this stamp you can check out my blog post here. I made a bunch of so cool paperclips.


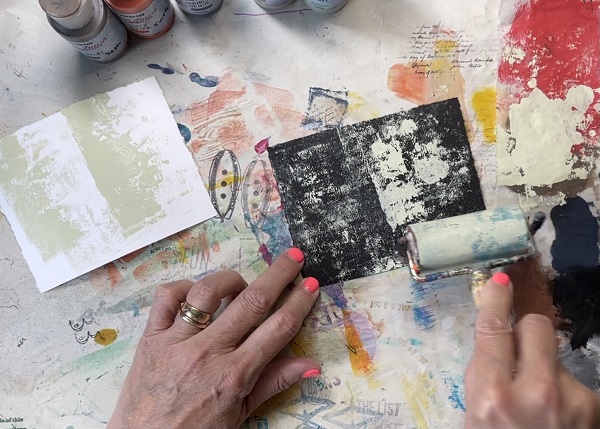
Took some Infusions & sprinkled them on wet watercolor paper. To pull up the excess walnut crystals simply press a piece of card stock on top of the wet product. Left side the watercolor, right is the 2nd print.

Next step was some die cutting using Tim Holtz die cuts by Sizzix, Crochet & Wild Flowers 1. Just love how delicate these die cuts are. 

The last step was adding some interest to the paper slide. It was distressed using watered down Roasted Coffee & then stamped with Thundercloud. The small images from the postage stamps were used like the script & postage marks. I love using my stamps in different ways! Those little details take this embellishment & make it look so much more dynamic. 


All that was left was assembly & even that was fun! Don't you love that crochet colored with Lemoncello & Golden Sands? Again just nummy. 

Some metal touches were added as the layers just go & go. They are all Tim Holtz from his Ideology Line. The arrow has the added bonus of some wire & beads wrapped around it. Well that is it for today!! I hope you enjoyed the tour of my art tag & that you have the chance to follow along with your own supplies.

Supplies:

Monday, July 5, 2021

Art Card with Seth Apter Products

 Hello, fans of all things inky! I am here working with some of Seth Apter's latest release for Topflight Stamps. This release is with one of my favorite companies, PaperArtsy & includes 3 new stamp sets & 4 new paints. *If the products are sold out on Topflight, simply click on the "email when available" button on the left side of the Topflight Stamps site to be notified when they are back in stock.


Decided to continue my journey into art card/pockets. This time I pulled out an art tag that was made a bit ago & created a companion pocket. It will go in my latest junk journal & made me very happy to create a home for this funky cool tag. If you want to check out the tag tutorial you can find it here. There is also a video so you can play along!

*** I have also changed my email subscription to Follow It. This is just general housekeeping but you should now receive my blog notification from them. If you didn't get this post in your in box be sure to check your spam folder & add "Follow It" as a contact. Also if you don't want to miss a post just add your email to the box on the right of my blog to receive them in your inbox! 


Here is a video for you!! Play along with me as I go through step by step to creating this mixed media card or pocket! This would also be great as a cover of a journal. Right let's get to inking!! I made 2 backgrounds & you can see them in the video.


Step 1: using the new colors (Fuzzy Cactus, Aquave, & Desert Bush) of Fresco Finish paint & a brayer, simply roll some paint onto card stock. 

White & black card were used to give me an option. In the end I went with the black card stock piece so the photos may be a bit different but the technique is the same.

Step 2: Add some stencil work. This was done using Mud Splat & Double Denim with a cosmetic sponge. Use a deli paper as your palette, then reuse it in your journals. You will see that is how I added my title below.  

Step 3: Embossed images add that fabulous pop of dimension & shine. I pull out my swatch book to help decide what colors to use. So handy. 

These images were added with stamps, wow embossing pad & 3 colors of powder. Crusty Copper (circle), Blue Moon & Sea of Tranquility. Great names for powder too, plus very accurate as far as a description goes. 

Step 4: Using a piece of junk deli paper from my stash, the quote was stamped in archival ink. The ink needs to dry for a minute then the piece was torn out & decoupaged to my card. Love that pop of color.

Finishing up. The edges were sew with my machine in sort of a sloppy, mixed stitches kinda way.  

Lastly the stencil images were inked & smudged to help add some dimension. White ink pen was also added to the embossed images. Just helps them pop. Thanks so much for joining me today!! I hope you check out my YouTube video, subscribe & play along. Have a great inky day!

Supplies:

LinkWithin

Related Posts Plugin for WordPress, Blogger...