Tuesday, December 6, 2022

December Roundup for Eileen Hull

 Hello Eileen Hull Friends! Can you believe we are well into December?? I cannot keep up with the flow of time & am just realizing that need to jump on the HoHoHo of the season! First it is time for our Inspiration Teams yearly roundup of favorite projects.  


Never an easy task to pick only 3, but that is the assignment. Here is my fancy photo with all 3 projects in it. Apparently this year I was really into color & also under developing my photos cause they all seem very light!


#1: Here we go in order of calendar release with the link included.. drum roll please. Gustov Klimt Box which was one of my Chapter 1 release projects. This was using Eileen's Book Box.


 #2: The Four Seasons Journal which was the release for Eileen's Maker Forte stamps in February. This also became a class at my local store in which we made a booklet every month to go in it. Started with the Full Size Journal, adding in the Snail Mail die & stamps. This one was very satisfying to complete.


#3: The Travel Journal which is also on it's way to becoming a class in a bit of a revised fashion. Love all the mix media on this one. Also lots of Eileen's stamps and quite a few of the smaller dies. Yes I love making books!! Thanks for a great year of support from everyone. I hope you have a fantastic holiday season & get to spend lots of time with friends & family. Cheers!

Wednesday, November 2, 2022

Comfort & Joy KickOff Class!

 Hello my Creative Friends, I hope you are signed up for Eileen Hull's Comfort & Joy Kickoff Class!!!! It is not too late to sign up. We have a full day of crafting fun with both video taped classes & Live classes. It is all day Nov.5th but have no fear everything will be stored in a Facebook group for you to see anytime you want. You can sign up here. It is only $20 and we have fabulous classes from the Inspiration and Education teams ready for you. Don't delay as Eileen needs to add you into the private, secret & very special Facebook Group held especially for this event. 

 Here is my project that I will be teaching. I am just putting the finishing touches on my videos so they can be uploaded & ready to go on Saturday. You can craft along with me or just watch & soak it all up then go back & make your book. Don't have a kit? Fret not, there is a product list so you know everything you need to be able to make your own unique book. 

Don't forget this is the 1st day in the 3rd annual Comfort & Joy crafting extravaganza. The teams will be back almost every weekday with inspiration for you. Just make sure you are part of the Eileen Hull Fan Club to take advantage of all the holiday spirit we will be tossing around! Make sure you answer the questions so we can be sure you are real & not an annoying robot! OK got to go finish those videos! Hope to see you on Saturday!!! 

Tuesday, October 25, 2022

How to Make Eileen Hull's Geometric Gift Box

Hello arty friends, today is tutorial day, how to make the Eileen Hull Geometric Gift Box by Sizzix. This project packs a dynamic punch yet is relatively quick and simple to make. In fact I took the pieces of the project home for a visit with my Mom assembling it while we chatted away. As always there is a supply list below. 
 

Here is just one way to use this papercraft box, as a beautiful gift box. This is a perfect gift for a hostess, teacher or friend. You can also use it to house pens, tags, paint brushes, or fake flowers for a decor item. The list is endless. I have linked a few videos below so you can see how Eileen die cuts & assembles this box. This Scoreboard XL includes triangle & star shapes to make extra design possibilities!
 

 Let's Get Started!

The 1st thing you will want to do is cut your base using mat board or cardboard. The photo above is with card board using Eileen's Vintage Button 3D Emboss with cardboard & paint. Just to show how versatile this product is. For my gift box I also recommend the Sizzix Making Essential mat board (Little Sizzles) link below. It is the perfect weight for the Scoreboard diecut & will guarantee success. You will want to cut 2 of the geometric portion, & one of the squares with tabs. Use one of the 3D embossing folders to create amazing texture on the 2 geometric pieces. I used Eileen's Woven Leather folder, which has amazing texture. Hot tip: The geometric piece is slightly longer then the embossing folder. For the 1st pass of the folder simply place your cutting mat before the line at the bottom of the folder. This way you will only emboss the pattern and not the folder line. Now turn your folder around and reposition then run through as normal to get the last bit embossed. The line won't be there!

Next step is to add Redline or Super Tape to the end tabs of each box piece. I also pulled out the Luster Wax for the next step.


Making the Design pop!

One of the match made in heaven duos is the 3D embossing folder & Luster Wax. The wax is super easy to use, with a nice smell & most importantly has a quick dry time. 
 
 
To apply just use a hard piece of foam with a small, thin layer of the wax. Skim the surface of the embossed areas to just pick up the high points. As you can see in this quick video changing the color of the base & wax completely changes the look of the project. Brown card stock with Gold Luster Wax for example. 


Time to Assemble. 

The best part of this box is it is so easy to assemble. Taking each of the geometric shapes, bend the pieces at the score lines using the side of a table, cut side facing up. Remove the protective paper from the Redline tape (using a pokey hole tool to slide between the red plastic and the tape makes this easy). Line up those 2 pieces and adhere the tab side to the non-tab side, making sure your pieces are in a straight line as in the photo above. 

 
Take the bottom piece (the square with tabs) bend the tabs, and add a strong wet glue like Ultrabond, in a fine line along the inside bottom of the box. Take your square piece tab side facing up and slide it into the box from the top and push it through to the bottom. It will fit really well and the glue just adds a little extra strength. Now we have a box!
 

To add details I covered a piece of the mat board (large enough to cover the star shape on the die cut) with Surfacez Metallic in Silver. This is a sticker sheet which makes this step easy. Once that was cut out a star brad was put through the hole in the middle. This was adhered over one of the triangles. Look at all that silvery texture! Now all that is left is what to put in your box. 
 

How To Video

If you want to see a video over view, of the box & how Eileen assembles the box including the lid, here is the Chapter 4 release video. This video includes the samples that were made with the dies plus some of the team (including me) showing their samples. This is a great group of gals!! If you just want to go straight to the info on this diecut go to the 1 hour 28 min. point. Eileen shows you how to cut, add the tape, bend the scor lines all the things!!
 

Expanded Geometric Box

This diecut can also be made into a much larger box as Eileen shows in this video. If you don't want to listen to the fun chatter & see the bonus samples of gorgeous projects start at the 19 minute mark. I know this is on my crafting list! I also used the lid to create a mini 3"x3" art journal which you can find examples of it my last post & on my Insta or Facebook pages (link on the right of this post).
 

Thanks so much for joining me today. I hope you enjoyed this tutorial, please leave a comment with your thoughts. I would love to hear from you. For more Eileen Hull inspiration make sure you join the Facebook Fan Club where Eileen does 2 live videos a week. Also check out the blog with links to lots of amazing creations & tutorials from the Inspiration & Education Teams. 

Supplies:

Tuesday, October 4, 2022

Eileen Hull Chapter 4 Release Time!!

 Hello Eileen Hull Fans! Can you believe it is October already??? What is going on with time? The good news it means it is release time as Chapter 4 is just raring to go. There are a number of awesome dies & a 3D Folder for you to fall in love with. 

Here is my contribution of just a few of my projects. I am visiting my Mom and staying longer then planned so a few projects are back home. I have made a super mini art journal from the lid of the Geometric Box. It measures 3x3 just the perfect small size. You could use one of the spines cut down from the other book dies as well. If you know me you know I had to make a book! 


 I had to show a close up of the 3D Folder Silverware. Can you believe these are made from paper? Amazing. 

As usual the Inspiration & Education teams have sneak peaks for you ready to go. Some may even have tutorials so make sure you hop on the blog hop! Keep checking back to Eileen's Blog for links to all the tutorials over the next few months. There are also prizes to win. I hope you join us on Eileen Hull's Facebook page for the release party. All the details are below. 
 

In Eileen's words...

The Geometric Box is a different kind of design for me. I love the ease of assembly, the unique shape and and the possibility of expanding the box into larger containers! This is a ScoreBoards die so it may be cut from sturdy materials like mat board, chipboard, metal, leather and fabric. The finished box measures 4” h x 3” w x 4” d… or so… a fun feature of this die is that it adapts to how you shape it. You’ll see 🙂 Watch my live stream videos to show how to expand the possibilities of this die.
Use the Geometric Box for storage- for pencils, silverware, flowers, or tools. The box may also be used as a gift container- imagine adding teabags, a pretty silver spoon and a bow as a get well gift!
The Sunflower is a Bigz L steel rule die- designed to cut and score a myriad of materials. The Sunflower is BIG- it measures about 4" across and comes with a leaf, three sizes of petals and a flower center! Stack layers of petals to make a traditional sunflower, or change colors and create a pink coneflower. The basic shape is there for you to create your own flowers! Make a stem for the flower using wire and your Twist and Style Tool. The coordinating Geometric Box die works perfectly as a vase.
I love the whimsical patterns of vintage cutlery and that's why I created this Silverware 3D embossing folder! The design is so detailed you can actually see a tiny bride and groom on the handle of a cake server.
This folder is perfect for creating seating charts, menus, invitations, cards and recipe books. You would be surprised at the many materials you can emboss- metal, paper, cardboard, Sizzix texture roll and more. Once you have embossed the image, rub a light coat of a metallic Luster Wax over the top of the design and you have an amazing result!
I hope you will give these dies a try. Please remember to share them in the Eileen Hull Fan Club Facebook group so we can all be inspired!
"Enter the giveaway! Comment during the Release Party video and answer this question, "What would you create with these dies?" We loved hearing all your amazing ideas last time and want to hear more! Extra points for creativity 🙂 There will be two winners- one on Facebook and one on YouTube. Entries closed at 5:00 pm on Oct. 10. Winners will be announced on my Tuesday 10/11 livestream."

Tuesday, September 6, 2022

Card Caddy Eileen Hull 3D Embossing Folder Holder

 Hello Eileen Hull Fans, I am here today with the Card Caddy which can hold 3D Embossing Holders! This month the Inspiration Team is working on the theme, Card Bonanza. This holder can be used to hold cards also & that was the idea for this post but I got really excited when I realized it makes the perfect decorated embossing folder holder. I am sure you can find other amazing ideas for this box as it is a great size!

*Affiliate- some of these companies have given me product to use, play & experiment with. The ideas are my own but I tend to work with companies whose products I like so enjoy the inspiration.  **some of these links are affiliate, I receive a small percentage from the company at no cost to you. This helps me deliver free content!


 Here is my finished project. This was a lot of fun to make and has sooooo many possibilities. Combine 3 in a row to make a larger holder, combine with other Eileen Hull Designs to make an organizer. Also it would be great for holding stamp sets, pens, and of course cards!


On with the show.. Start by cutting 4 sides for the box. On the 1st piece you will want to have all of the spine and about 3 3/4" of the back cover. The other 3 pieces you just need to cut the side & about 1" or so of the spine. I was inventing how to do this as I went so the instructions are a tiny bit different then the photo. Have the 1st piece be your bottom piece & the other pieces will be built on top of that one. Put strong glue like Redline & Ultra Bond on the flap and adhere to the 1st piece like building walls. Don't worry about gluing the sides at this point just that they line up. 


Adhere the next side in the same way. My base is just a tad bit short so yours will look a little different. 


The last piece I trimmed the sides of the flap a bit but not sure that was necessary. It made it fit smoothly & we will reinforce that. This was adhered the same way as the other pieces. 


Line up the edge of the sides and adhere using a strong wet glue like Ultra Bond. I used masking tape to help it hold while the glue was setting. 


Using the long side from the Skinny Mini Box I cut 4 of the longer sides. This will reinforce the box to make it nice & strong. 

Trim down the book sides to make them about 1" tall. Then trim the side that does not have the tab so it will fit inside the box. Add Redline Tape to the long & short tab. 


Push each piece down to the bottom of the box. This will make the box nice & solid. It doesn't look pretty but we will fix that.


I decided to add some decorative washi tape. This will stay on the project adding extra support and bonus the pattern will show through on some of the design. I also cut a piece that fit on the bottom to cover all the shenanigans. You will want to measure this as each box may have small differences in measurement. The mat board was covered in paper and simply pushed down into the bottom.


Time to decorate! The possibilities are endless. If you are using paper you can cover the mat board first to make assembly quick & easy. I like adding the paper later and leaving a wee boarder. This way the paper is not involved in assembly and can sometimes make the box come together better. Try both ways to see what you like best. For this box I wanted a mixed media look. Added Texture Paste on the front piece leaving a space in the middle for my butterfly. Set that aside to dry.  
 

While the box is drying, time to make the butterfly. I used quick cure resin and the newest Prima Mold. This resin sets in 15 minutes!


For the color I used Distress Spray Stains in browns, with a touch of orange & blue. While that was drying, went back to the butterfly.


The butterfly was painted with a coat of gesso 1st. This is important otherwise the paint will chip off. The gesso creates a foundation that keeps the layers together. I used Distress Paint in Salvaged Patina, Twisted Citron & Salt Water Taffy. Once dried it was adhered to the box using 3D glue by Prima. 


Next up was my favorite thing to do & that is add Luster Wax to make the images way more dynamic. A bit on a hard piece of foam & simply hit the high spots. 


For the sides and the quote Stamperia paper was used. I just love the images on their papers. Thanks so much for joining me today. If you aren't already make sure you join the Eileen Hull Fan Club on Facebook for lots of Live Video fun. Also check her blog to see all the inspiration my team mates have for you. Now go get inky!!

Supply List:

Tuesday, August 2, 2022

Eileen Hull Chapter 3 Release 2022

Hello Eileen Hull fans, it is time for the newest release! Chapter 3 is full of awesome potential & the Inspiration Team has lots of ideas for you. There is a blog hop & prizes, hope you tune in tomorrow for the Facebook Live where the project samples will be shown and the usual shenanigans will ensue.You can read all about it below.


Here is my sneak peak, tutorials will be coming along in the next few months. I made a sideways Skinny Mini Art Journal, a duo of Skinny Mini Books, an  enlarged card box that fits the journals & a background or card front idea. There is also a few ideas using the 3D Embossing Folder inside the books. 


In Eileen's words..."I am so excited to share my Chapter 3 Sizzix die collection! Each piece in the set stands alone but also coordinates with the others to make a truly versatile and valuable addition to your collection.

The ScoreBoards Skinny Mini Book Box is a really great size- it measures 6 3/4" x 4" with an adjustable built in spine from 3/8" to 2 1/4". This die may be used to create a book by die cutting two covers OR a box if you add the side pieces to the covers. If you add the box supports, it will hold mini-slimline size cards.
The Skinny Mini Elements Thinlits will cut a cool star pattern that perfectly covers the front of the Skinny Mini book or the front of a slimline card. And you can also expand the size of the design to create a whole page pattern.
I have been wanting to make a Card Caddy die for a while... so many people are making cards these days that I figured that they would love to have the ability to make a really pretty container to hold them. I love the shape of this box and it goes together so quickly- also fun to decorate! It will hold cards up to 5 1/4" wide.
The 3D folder is called Woven Leather and it looks so realistic! Makes a great background for cards, journal pages or covers.
The team has been busy creating lots of samples so please make sure to read the blog and be watching social media to see their makes!
There will be prizes! Make sure to post your answer in the comments on the live. Ready? Here's the question: "Which is your favorite Ch. 3 die and what would you make with it?" Be specific- inquiring minds want to know! 🙂

To follow the blog hop simply go to Eileen's Blog & there will be  a list of all the gals inspiring ! 
Here is the link to Eileen's Facebook Page for the live. I may see you there! 
Happy Creating.

Tuesday, July 5, 2022

It's Time To Travel!

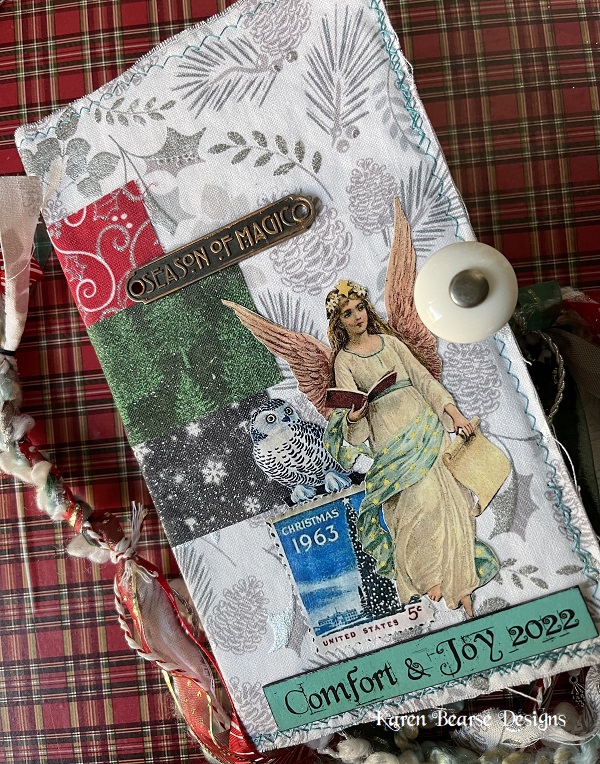
Hello Fans of Eileen Hull it is time to travel! With so much of the world being opened up again let's make a Travel Journal. It could be used for older trips or ones that are upcoming, or a combination of both. This book has the space for 5 signatures & I plan on using it for 3-5 trips depending on the number of photos I take. Using my favorite book the Full Size Journal was a good place to start.
*Affiliate- some of these companies have given me product to use, play & experiment with. The ideas are my own but I tend to work with companies whose products I like so enjoy the inspiration.  **some of these links are affiliate, I receive a small percentage from the company at no cost to you. This helps me deliver free content! 


You can make this book in as little as a day, with these simple directions. However this book took me days & days to create. Creating involves lots of decisions, play time plus trial & error. As usual I got carried away so there are a lot of techniques. While my cover was drying, I would work on elements for the inside or the 1st travel booklet. If you want to make this book that is my suggestion but I will do my tutorial on the cover 1st. I also made  a few mistakes along the way so I will let you know what does not work, or an easier way to get the same result.


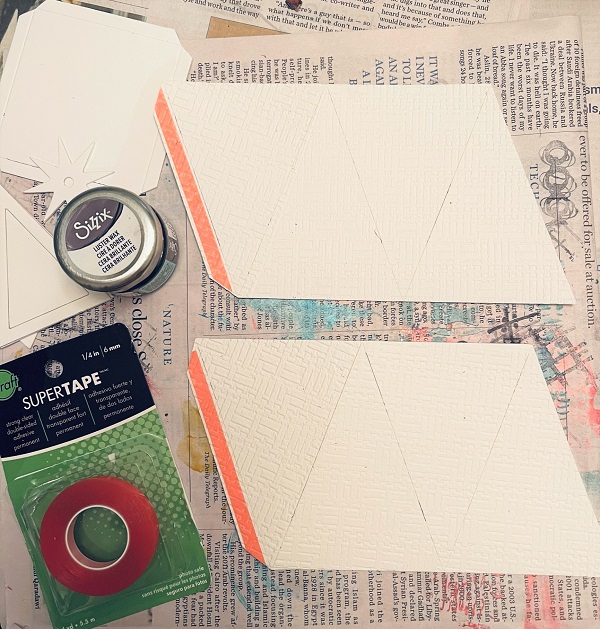
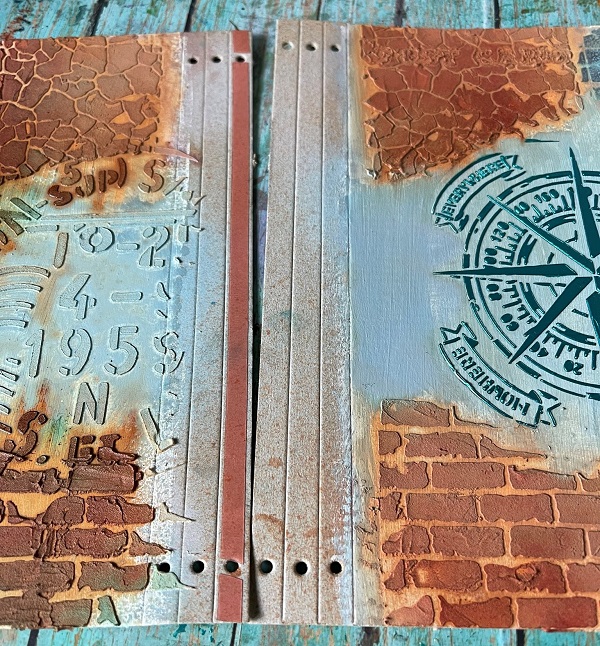
Start by cutting 2 pieces of the Full Size Journal (links to all supplies are below). You will need the bigger Sizzix machine, the Plus or Switch Plus for this. I just used card board for this. I covered the card board with gesso but I don't recommend this. It ended up being a mistake as what I forgot, Distress Oxide does not dry on a gessoed surface. Crazy right? To fix this I would cover the pieces with mix media or watercolor paper.
 
 
Next step was adding texture. I mixed some paint with crackle paint translucent. The great thing about this technique is you get the true color of the paint. Then added it through a stencil. I was thinking in hind sight to color the base first. The challenge was adding color after makes it difficult to keep the brown stencil image.

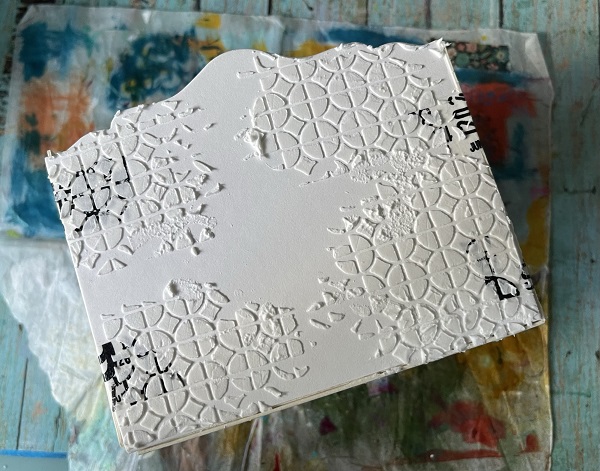
Next step was adding stencil images using modeling paste. I don't have a pic of this step. The stencil & postage image were white & set aside to dry. Once dry they were colored with distress spray stain & oxide. The stenciled images grabbed the color and the gesso part became a pastel, which then refused to dry fully. If you used paper instead you won't have this problem. I also came up with a solution to my problem, which I share when I get to that point.
 
I used stencil butter with a Stamperia stencil that was perfect for my theme. What I love about this product is it keeps it's shape even if the stencil is detailed.
 

Hot tip: while you have the stencil & paste out it is a good idea to create another piece. I covered a piece of scrapbook paper which I can use inside my book as a tuck or tip in. You can see here how fine & perfect the details are. This product is the reason for that crispness.
 
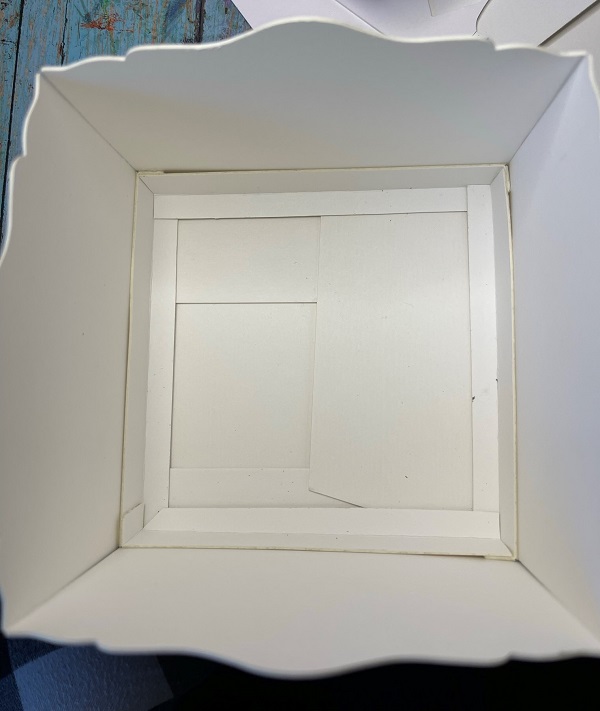
Once my covers were dry it was time to adhere them together. Just put a strip of Super Tape down one of the edges of the spine. Over lap the edge spines pieces & line up those middle set of holes. Easy peasy. You will go from 6 holes top & bottom to 5 holes.
 
I reinforced the spine with a piece of card board & then re-punched the holes. 
 
If you used paper to cover your books you can skip this next step. To fix the non drying Distress Oxide I painted those spots with like color Distress Paint. It still would not dry all the way, I figure as it was sliding around on the gesso. This was finally fixed by covering it with Collage Medium. It looks patchy but that will be fixed in the next step.

To help this area blend in better, stamping in different colors of archival ink were added. I used all kinds of travel type stamps. For the back cover. A fleur des lys was heat embossed in metallic gold on a piece of scrapbook paper & cut out. A few pieces of washi tape was a good base for this embellishment. 
 

I knew I wanted some hand made embellishments for the cover & also to use on the inside to travel things up. Started with the Snail Mail die Cut on a parchment type paper. 

Next step was to stamp the sectioned pieces with different colors of Archival Ink. 
 

 I pulled apart the sections & added small stamps & die cut images. This was just plain fun. For the 2 pieces that I used on the cover, they were embossed with UTEE.
 

 The postage stamp pieces were layered with some Tim Holtz ephemera. Love this cluster of travel fun! 
 
To finish up the cover some chipboard pieces from Stamperia Sir Vagabond Aviator were added. I also added the door hanger which will be part of my closure. This was from my stash & is an old 7Gypsies element. Always great to get some stash items used up with the new stuff! You can see that a clasp was used to clip on the ring of the door hanger. This will be my book closure.

 
Here is a picture of the clasp which was adhered with a jump ring to a chain. The challenge with making closures for these books is there is no way of knowing how long to make them. I don't yet know how big my book is going to get. I solved this by using a small safety pin on the chain which clips to a jump ring on the back of the book. Leaving extra chain dangling down means as my book grows I can just move the safety pin making the closure larger. Bonus is being able to add charms to the chain.


For the spine a piece of fabric was glued on using Ultra Hold Glue. Once dry the holes were re-punched. Elastic was added so my booklets can slide in & out. I added the beaded strips separately as the elastic is too fat for a lot of the beads I wanted to use. Thin but strong hemp was simply knotted on the inside of the book & a drop of glue on the knots to keep them solid. 
 
 
Here is a video to show you how to create the hidden spine. Then you simply add your beaded pieces with hemp or thinner cording. This way your signatures benefit from a strong elastic like 1mm, but you can still add a wide variety of beads to you project. This was a bit different then the way I did mine but their is video of this one so yay.
 
 
Of course the textured images were begging for Luster Wax. I added both the gold & rose gold with a hard piece of foam, only hitting the high points. A bit of wax was also added to the chipboard pieces. 
 
 
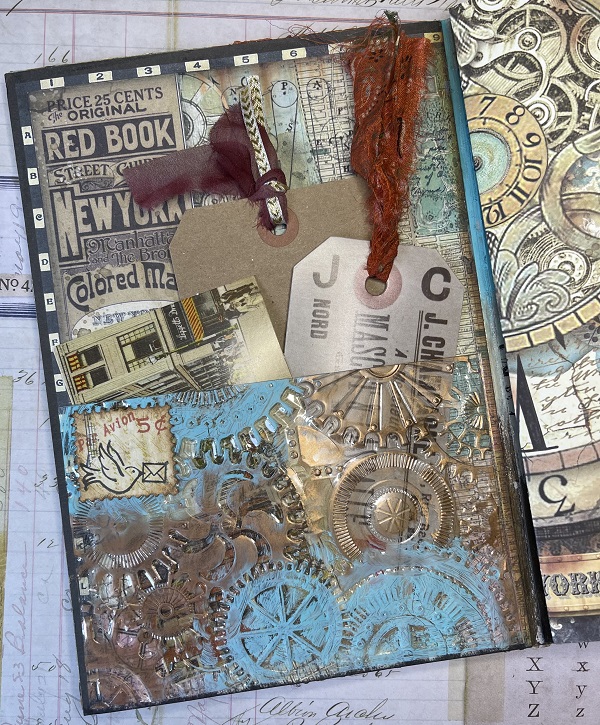
Let's give you some ideas for the inside of the book. I used more of the Stamperia collection. Cutting the papers to fit the inside covers. The pocket was made with a piece of acetate run through an embossing folder. The high points of this pocket were hit with some Salvaged Patina paint & Luster Wax. One of my postage stamps was added. I also left space for a title as I wasn't ready to commit.  

 
Here is a bit of a close up of the pocket, just nummy inkyness! Hot Tip: use Super Tape to adhere the pocket. It is the only thing I know of that will hold acetate. 


My 1st travel booklet has a combination of different papers but the cover is more of that luscious Stamperia. Well this post seems nice & long enough. I hope you get a chance to work on a book of your own. I have been posting more photos of this project on my Instagram if you want to check them out over there. 

Supplies:

LinkWithin

Related Posts Plugin for WordPress, Blogger...