Monday, February 15, 2021

Mixed Media Mayhem with PaperArtsy

Hello Blogland, here today with an art journal page for Topflight Stamps. I hope you had a wonderful Valentine's or Galentine's Day!! Can you believe we are half way through February? Time is flying by so let's have some inky fun today. 


Magic The Art Journal Page.

I am having fun working in my Art By Marlene book. The pages are a good quality mixed media paper & I love that the page can be removed to work on. This page was created by letting go & just letting it happen. It may be too much what do you think? My background isn't really a back ground as there is so much going on. It could be considered a hot mess. I haven't decided yet, but it was so freeing to just keep adding whatever I felt like. That hasn't happened in a long time & it felt so so good! 


Start the page:

With a stencil & some modeling, lava or crackle paste. Let the paste dry completely. I decided to do some more experimenting with Lava Paste. Last time I heat set it & it got quite puffy. You can see that post here. This time I just let it dry naturally to see what would happen. It dried like a regular paste, mine is about a year old & it has gone a shell yellow color. If your paste color changes & you don't like it just add a layer of white gesso.

 Once my paste was totally dry, as in the next day dry. It was time to add some color! I dusted out some Infusions. A little goes along way. 


Color Pop with Infusions

Time to mist on some water. This was a quick video reel I put on my Instagram. I post there almost daily if you want to be up on all my shenanigans! Click the social media link on the right side of this page if you want to follow me!!


The paper was holding up pretty well but I decided to add some gesso to get a better foundation to add more Infusions. The difference is the Infusions move better on a surface with gesso as the ink sits on top of the paper giving more time to play & move the color around. 


How About Some Fun?!

Next up was some more dimension, adding some puzzle pieces. They don't add too much weight to your page which is a bonus. You can see the gesso covered up some of my Infusions but that is ok. Some paint was also dry brushed on. Realized that paint under the Infusions would add some good depth.

Time to add the Infusions back in. Mixed Media is all about the layers! Now we are getting somewhere. You can see the difference as the ink is moved around. Love how the ink brings out the textures created by the gesso, the wrinkles etc. You can see on the right how wetting & moving the paper helps spread the color. 


 Here are the paint colors I used, added some to the puzzle pieces as well.


Time To Fly 

Let's add some background stamping. This was done with Seth's fun zig zag sewing type stamp & Archival Ink. At this point I stopped thinking & just added whatever moved me. How about some embossing? Using the wonky popsicle stamp & Weathered Gold seemed a good place to start. 


Pulling out my swatch chart to decide what to emboss on the puzzle pieces was next. Sea of Tranquility seemed a good choice it is one of my favs. I used the number stamp from the set ESA17. This is also the set my title "Magic" comes from. 


I just used pieces of the stamp on each puzzle section. Love that random look it creates. Sea of Tranquility not only has a great name but the look once the emboss is heated is blue with flecks of teal, gold & white. So dynamic!


Let's hit those high points! Using Rich Copper wax & a hard piece of foam it was time to make that emboss pop. Simply scuff the wax across the raised parts of the embossing. Izink glaze in Cold Gold was scraped on with a spatula. This is a translucent glaze that creates luscious dimension. A bit of the Whiskey Frost was also added. It gives a honey looking glaze to your project. 


Time for a Focal Image. 

To create the cool hand more layers were created. Guess I was in a layering mood! 1st stamp with archival ink. The large jumble background stamp from the Journey set was used. 2nd stamp on top of this using a translucent emboss. Not sure what color to use so 2 samples were made the right side with Maize & the one that was used on the page, in Crimson. Love how the text shows through- so cool. The hand was cut out & then I went one step further. 
 
 
3rd was to stamp the sketchy bullseye from that same set & emboss with Crusty Copper. SO MUCH FUN!!! Careful when heating this 2nd emboss so the image doesn't blend into the other glaze layer. Just start & stop when the image starts to move, repeat until you are happy. Add some edging with a pen if you want. 


Time to wrap this crazy up!!! Last few steps were to stamp & cut my title Magic. Magic & the hand were adhered with foam squares. Page re-enforcers were made by adding Crusty Copper directly on Double sided adhesive mounted on card stock & heat set. Once cool they were run through my Sizzix Sidekick. The perfect finish to this awesome art session.
 
 
Thanks so much for joining me today!! I hope you are inspired to have your own messy art session! Until next time!!

Supplies: 

*remember use the code karenbearse @topflightstamps to save 12%.

  •  Seth Apter Stamps by PaperArtsy: The Hand-EM37
  • "                       "      zig zag Sewing- EM54
  • "                       " wonky popsicle EM52 
  • "                        ' Magic Set ESA17 
  • "                        " Journey Set ESA13
  • Seth Apter Emboss by WOW in Crusty Copper & Weathered Gold from the Metalz Trio & Sea Of Tranquility from Cosmic Trio
  • Sara Naumann stencil  by PaperArtsy PS204
  • Fresco Finish Paint by PaperArtsy in 
  • Infusions -  Black Current, A Touch of Jade
  • Gee-Sso Good by Indigo Blu
  • Lava Paste 
  • Seth Apter Izink Ice in Cold Gold, & Whiskey Frost
  • Prima Rich Copper Wax 
  • Foam Squares & Double Sided Adhesive by Thermoweb

Tuesday, February 2, 2021

Eileen Hull Chapter 1 Release & Blog Hop

Hurray it is Chapter 1 Release time!!! The Eileen Hull teams are at it again with a fabulous blog hop filled with inspiration & wonder! Check below for all the details followed by some more sneak peaks. The 1st part of this tutorial is here. Part 2 is here. 

*Affiliate- some of these companies have given me product to use, play & experiment with. The ideas are my own but I tend to work with companies whose products I like so enjoy the inspiration.  **some of these links are affiliate, I receive a small percentage from the company at no cost to you. This helps me deliver free content!

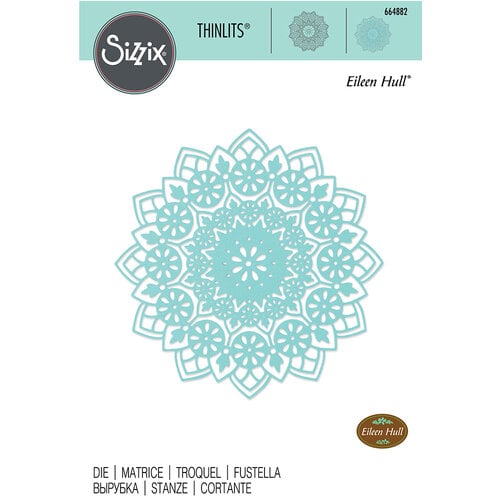
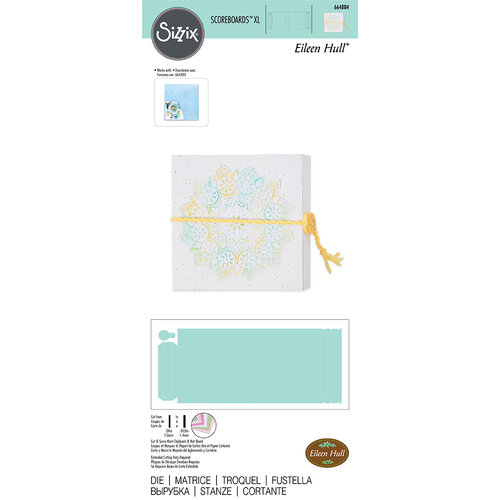
The Folio Journal die cut is fabulous as the base of my project & there are so many different ways to use it as you will see as you hop along! I settled on making a Junk Journal, although I also have a fabric book in the works. On the cover you can see the Mandala Thinlet was used. Links to products below. 


Welcome to the Chapter 1 Eileen Hull/Sizzix Release Party Blog Hop! Just wait till you see all of the fun options the new Score Boards Folio Journal die has in store for you! You will also love the Mandala and Folio Page, Pockets and Flower Thinlits dies that coordinate ❤
Please hop through the blogs and be inspired by the work of the talented Inspiration and Educator teams! Leave a comment for each designer and you could win a Folio Journal die (as soon as it arrives!)
Join me and specials guests for a Facebook Live on Wednesday, Feb. 3 at noon Eastern. Comment on our Facebook Live and be eligible to win either the Mandela die or the Folio Pages, Pockets and Flowers die- two winners!
Winners will be announced on the Facebook Live show on February 9 at 6:00 EST.
Be sure to join Eileen & a few special surprise guests on her Facebook Live at noon EST today Feb. 3rd. 

Hot tip: if you want to get a peak & maybe a wee flip of my book tune into the Live. The links to the hop are below, if you get lost you can always come back here or go to Eileen's Blog. 

Let's Have a Few Peeks.

This book spine has 5 signatures but I made mine with 4. Like Eileen's other book dies, there is the option to use elastic so the signatures can be pulled in & out. You can also bind the book, permanently through the holes that are in the spine for example.
 
 
For the spine I made a removable ribbon cluster. I love these! I left room to add some more charms as I build my book. 
 
 
Here is the front inside of my book, you can see the page pocket from the thinlet die, so handy!


Here is the front of the 1st signature.  I used lots of gel prints in this book & left overs from other projects. It feels so good to use up my stash. You can follow my blog to be notified for new posts. Thanks so much for joining the teams on this exciting day. I hope we see you in the Facebook Live, if you miss it you can always watch on replay! 
 

Supplies: Eileen's Release


Folio Journal XL Die- coming soon in the US 
 
 Sizzix - ScoreBoards XL Die - Folio Journal


Monday, February 1, 2021

Art Journal Page to Chase the Blues Away

Hello Inky Painty Fans! For this Mixed Media Monday I have an art journal page for you. It has been a long time since I finished a larger page & it felt good to get back to it! This week is anything goes at Topflight Stamps so let's play with a few fun products. *Affiliate- some of these companies have given me product to use, play & experiment with. The ideas are my own but I tend to work with companies whose products I like so enjoy the inspiration.  **some of these links are affiliate, I receive a small percentage from the company at no cost to you. This helps me deliver free content!


I got a new art journal from Art By Marlene & one of the cool things is it is a 3 ring binder. The paper is a nice 300 gsm multi purpose paper which measures 6 3/4" x almost 9".  


The outside is vinyl & there is also a zip pocket on the inside to hold your ephemera, cut out stamp images or paper elements pad. I love the vibrant colors of these paper element pieces.

Design Time.  

I started by choosing which paper element pieces I wanted and placing them on my page. Taking a photo at this stage is always a good idea to remind you of placement.


Let's Paint!

Next up was dry brushing Fresco Finish paint directly on the paper. I used a palette of blues, yellow & green. This will help the hot colors of the diecut pieces to pop. 
 

Using up the excess paint on a 2nd art journal page means that I have a background already started for next time. 


Adding Some Stencil Work

Using some fun Darkroom Door Stencils and a dabber to add some background interest, was up next.  I kept the color's similar to the background but I did want the stencil work to show a bit. Again used up the extra paint by adding some stencil work, this time in my daily journal.


Doodle Time! 

I really love the circles from the Polka Dot stencil so doodling helped bring out the design a bit more. One of the bonuses of Fresco Finish paint is you can use a pen right way without damaging the pen. Most acrylic paint would need 4-6 hours to dry before you could draw on it.


Rebuild the Elements

Now it was time to add my elements back in & adhere them to the page. Love where this is going so far! The great thing is, these elements are already cut you just have to pop them out of the paper pad. The tea package was made into a pocket by taping the bottom & sides only. I love using everyday ephemera in my work to remind me of things like the tea I was drinking at the time. 


Add a Title

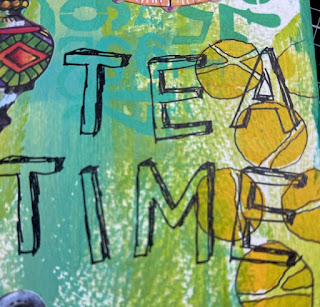
Now it was time to add a title using my favorite new alphabet stamp set. The words were stamped on white card stock & cut out. The letters have lots of little details that would get lost by fussy cutting. There is a trick so you won't lose these. This is a great technique to use for example when you don't want to cut out bee antenna, or a birds legs. 


Simply stamp the images directly on the background of your art journal page. Now the little details are there. Just adhere the cut out pieces on top. For the letters hot tip the top of the letters have depth & the bottom are just a line. This helps for letters like i or o so you don't stamp them upside down. 
 

The result is very subtle in this case but adds depth & the little details without a white edge showing.
 

Lastly I used the same color palette to make up my tag. More of the paper elements were used as well as a few quotes from Marlene's Sticky Quote pad. 
 
  
The tag was coated in decoupage glue so the elements will not pull off when it is removed from the pocket. Don't you love that cute little fish?
 

 The bonus is every Yogi Tea tag has a quote on it. I choose "happiness is an accomplishment" which is a very perfect quote for times like these. That little tag peaking out of the tea pocket makes me so stinkin happy!! Thanks for joining me today, I hope I inspired you to get some paint on! You can see pictures of the products in my Topflight Stamps blogpost.

Supplies:

LinkWithin

Related Posts Plugin for WordPress, Blogger...