Hello Fans of Eileen Hull it is time to travel! With so much of the world being opened up again let's make a Travel Journal. It could be used for older trips or ones that are upcoming, or a combination of both. This book has the space for 5 signatures & I plan on using it for 3-5 trips depending on the number of photos I take. Using my favorite book the Full Size Journal was a good place to start.

*Affiliate- some of these companies have given me product to use, play & experiment with. The ideas are my own but I tend to work with companies whose products I like so enjoy the inspiration. **some of these links are affiliate, I receive a small percentage from the company at no cost to you. This helps me deliver free content!

You can make this book in as little as a day, with these simple directions. However this book took me days & days to create. Creating involves lots of decisions, play time plus trial & error. As usual I got carried away so there are a lot of techniques. While my cover was drying, I would work on elements for the inside or the 1st travel booklet. If you want to make this book that is my suggestion but I will do my tutorial on the cover 1st. I also made a few mistakes along the way so I will let you know what does not work, or an easier way to get the same result.

Start by cutting 2 pieces of the Full Size Journal (links to all supplies are below). You will need the bigger Sizzix machine, the Plus or Switch Plus for this. I just used card board for this. I covered the card board with gesso but I don't recommend this. It ended up being a mistake as what I forgot, Distress Oxide does not dry on a gessoed surface. Crazy right? To fix this I would cover the pieces with mix media or watercolor paper.

Next step was adding texture. I mixed some paint with crackle paint translucent. The great thing about this technique is you get the true color of the paint. Then added it through a stencil. I was thinking in hind sight to color the base first. The challenge was adding color after makes it difficult to keep the brown stencil image.


Hot tip: while you have the stencil & paste out it is a good idea to create another piece. I covered a piece of scrapbook paper which I can use inside my book as a tuck or tip in. You can see here how fine & perfect the details are. This product is the reason for that crispness.
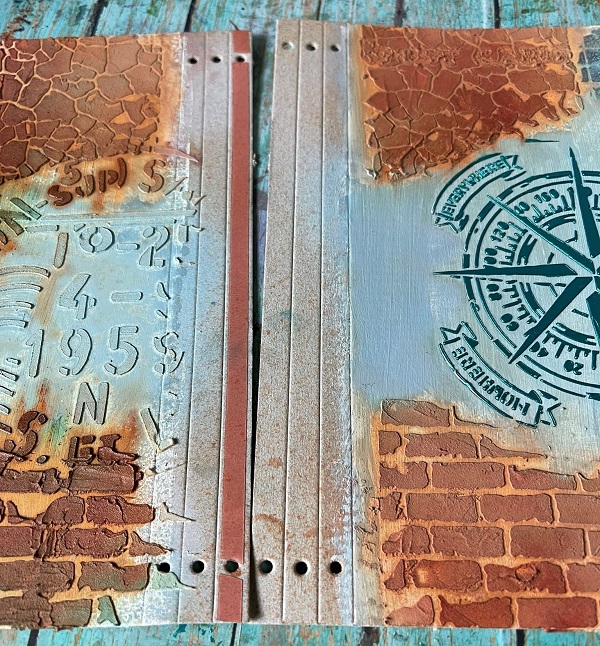


If you used paper to cover your books you can skip this next step. To fix the non drying Distress Oxide I painted those spots with like color Distress Paint. It still would not dry all the way, I figure as it was sliding around on the gesso. This was finally fixed by covering it with Collage Medium. It looks patchy but that will be fixed in the next step.


I knew I wanted some hand made embellishments for the cover & also to use on the inside to travel things up. Started with the Snail Mail die Cut on a parchment type paper.


I pulled apart the sections & added small stamps & die cut images. This was just plain fun. For the 2 pieces that I used on the cover, they were embossed with UTEE.

The postage stamp pieces were layered with some Tim Holtz ephemera. Love this cluster of travel fun!


Here is a picture of the clasp which was adhered with a jump ring to a chain. The challenge with making closures for these books is there is no way of knowing how long to make them. I don't yet know how big my book is going to get. I solved this by using a small safety pin on the chain which clips to a jump ring on the back of the book. Leaving extra chain dangling down means as my book grows I can just move the safety pin making the closure larger. Bonus is being able to add charms to the chain.

For the spine a piece of fabric was glued on using Ultra Hold Glue. Once dry the holes were re-punched. Elastic was added so my booklets can slide in & out. I added the beaded strips separately as the elastic is too fat for a lot of the beads I wanted to use. Thin but strong hemp was simply knotted on the inside of the book & a drop of glue on the knots to keep them solid.
Here is a video to show you how to create the hidden spine. Then you simply add your beaded pieces with hemp or thinner cording. This way your signatures benefit from a strong elastic like 1mm, but you can still add a wide variety of beads to you project. This was a bit different then the way I did mine but their is video of this one so yay.

Of course the textured images were begging for Luster Wax. I added both the gold & rose gold with a hard piece of foam, only hitting the high points. A bit of wax was also added to the chipboard pieces.
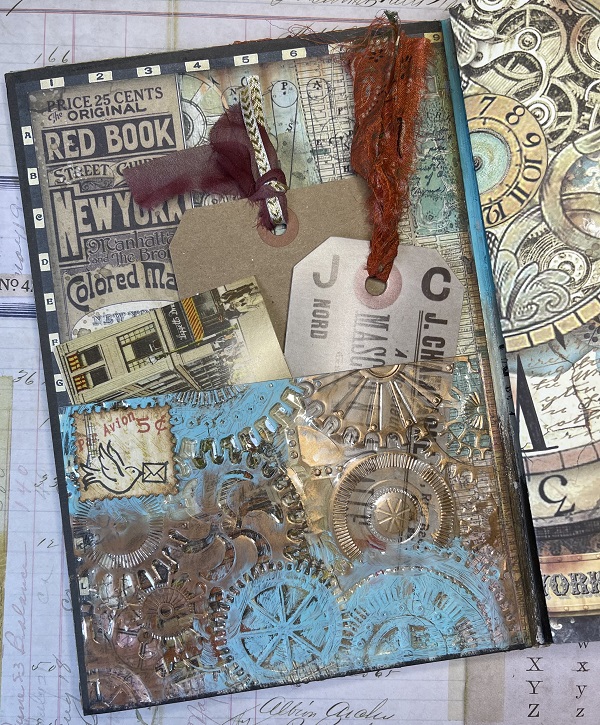
Let's give you some ideas for the inside of the book. I used more of the Stamperia collection. Cutting the papers to fit the inside covers. The pocket was made with a piece of acetate run through an embossing folder. The high points of this pocket were hit with some Salvaged Patina paint & Luster Wax. One of my postage stamps was added. I also left space for a title as I wasn't ready to commit.

Here is a bit of a close up of the pocket, just nummy inkyness! Hot Tip: use Super Tape to adhere the pocket. It is the only thing I know of that will hold acetate.

My 1st travel booklet has a combination of different papers but the cover is more of that luscious Stamperia. Well this post seems nice & long enough. I hope you get a chance to work on a book of your own. I have been posting more photos of this project on my Instagram if you want to check them out over there.
Supplies:
- Eileen Hull Full Size Journal by Sizzix.
- " " Shadow Box Frame set #1 & #2
- Eileen Hull Stamps by MakerForte- Snail Mail, Making Plans
- Tim Holtz stencils - Focus, Crackle & Bricked
- Distress Paint in Ground Espresso, Weathered Wood, Speckled Egg
- Distress Spray & Distress Oxide Spray in Speckled Egg, Rusty Hinge & Weathered Wood.
- Crackle Paint Translucent by Ranger Ink
- Texture Paste Opaque by " "
- Stamperia stencil compass
- Stamperia Sir Vagabond Aviation paper & chipboard pieces
- Tim Holtz Stamps- some are older CMS088, CMS159, CMS338, CMS426, CMS395
- Tim Holtz Ephemera by Idea-ology
- TCW Stencil Butter in Turquoise
- Super Tape or Redline Tape


