Saturday, February 27, 2016

Art Journal Fun With Foil

I have wanted to play in my art journal with foil since last summer now. Time gets so busy doesn't it? I was recently at CHA 2016 and had the good fortune to be sent some Therm O Web products thanks to the Prime Blogger Event. Prime hosted an awesome networking  event where I was able to meet & talk with manufacturers that want to build relationships with designers. I had this idea that I could use the DecoFoil on art journal pages with stencils. The results surpassed my expectations! 

 In case you are not familiar with the product, DecoFoil is just as it sounds a decorative foil! It requires adhering but can be used in many cool ways. Check out their blog here for tons of project info. I used their liquid DecoFoil adhesive which has a 1-2 hour drying time. At first I thought this would be road block but it turns out to work splendidly. Read on to find out why.

I took art journals that had some background paint already and just played. Pouring out a dollop of adhesive on my craft sheet I used a foamy and dabbed through stencils. I made a bunch of samples and set them aside to dry for the required 1-2 hours. The bonus of this is being able to foil multiple pieces once the adhesive is dry. The most amazing thing I discovered was in a test. I set aside a few pieces with just the glue, drying. 2 days later, the DecoFoil adhesive was still sticky!!!!

Here is my stenciled piece with just the adhesive, look closely the image is there and looks clear but visible. 
Simply lay the foil on the stenciled image, shiny side up, rub using your finger or a bone folder. Look how pretty using 2 different foil colors, Aqua & Spring Green, looks.

 On this sample simply distress the edges with adhesive. When it is dry/sticky rub different colors randomly on the edges where the glue is. Red & Spring Green look great together.
For this piece I used another stencil as above on a book page. 

This time I rubbed one piece of multi colored foil appropriately called Rainbow. This is just so cool and shimmery. Of course the camera gives just a glimpse of how fabulous the colors are.  One of the great things about using foil in an art journal, when you turn the page the light hits and bam, shimmery goodness. 

This is another example of using a stencil on a wipe off art journal page. Colors of foil are Rainbow as well as Lilac, Spring Green, and Champagne. Last but not least, my test projects I left sitting out. I wanted to see if the glue would remain sticky if life came up and I couldn't get to the piece. Amazingly the glue worked just as well. After sitting around for 2 days the foil still adhered perfectly!

I distressed the edges of a journal card with Aqua foil. A simple yet fun way to jazz up this card.
Also distressed the edges of some left over stamped and colored images that were sitting on my desk. I used the Rainbow foil. Now they have more of a finished look. I can easily pop these on to an art journal page. Caution this technique is addicting! I may have to go back though my art journals adding foil along the way. What would you add foil to?
 

Supplies for Art Journal Fun with Foil: 

DecoFoil in a variety of colors
DecoFoil Adhesive
TCW stencils
cosmetic sponge
bone folder
art journal pages
journal card

Tuesday, February 23, 2016

Let's make a Star Sun Catcher!

I have a tutorial up today on the Resin Craft blog, we are making Star Sun Catchers! Here is a pic of the finished project. You can use any open chipboard piece to make this project. 

You can check out the full tutorial over here.

Wednesday, February 17, 2016

Heart Tag With Linnie Blooms

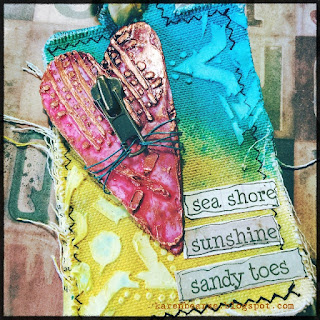
I have a heart tag tutorial over on the Linnie Blooms blog today. Come check out this fun project using Seth Apter stencils, and Tattered Angels Glimmer Mists. Here is a close up! You can find the post here. 
 Enjoy!

Sunday, February 14, 2016

A Page From My Favorite Book #2

Awhile back I started My Favorite Book, an art journal featuring my favorite pictures along with some inky fun. You can see the first post here. I love working in this and keep it by my desk as a place to slap down extra paint or stencil work. I want to work in it more and to help that happen I have printed out a few photos and will put them in an envelope at the front of the book to make my process faster. The idea is to use stuff from my stash, that new cool stamp that doesn't quite go anywhere yet or what ever fun things I may have lying on my desk. 

This favorite photo was taken with my daughter when we were living in Vancouver, Canada. I love the colors and the memory that is attached to the photo. I played with Dyan Reveley's stencils and paint for this one. Love it! The journal spot is a post-it note. 
I added a tab on the side cause I love em! I will try to post more of these just for fun! Hope you are having a Happy Valentine's Day!

Wednesday, February 10, 2016

January Words & Paintery Challenge

I am here in blog land with an art journal page for the January Words & Paintery challenge. This is my first time playing along & I am excited to be here. Canvas Corp Brands is supplying the prize which is an added bonus. Here is my art journal page. I covered the previous art journal pages so you could see more clearly the cropped edge. You can see how the page looks in the journal at the end of this post. 


The challenge can be found here. The color scheme as you can see is blue red and brown with the journal prompt "what you do today can improve all your tomorrows". I started my page by cutting the edge with the cool Dylusions ruler that has a curved edge. I embossed some tags and glued them to my page. Next was pulling out some Glimmer Mist and Glam. This photo was taken before I decided to use this page for the challenge so the colors are a bit different. Just to give you an idea of what products were being used.

  I spritzed and painted my colors on my background, then added some Glimmer Mist through a stencil. I wish you could see more of the glitter- hard to photograph.


Next step was adding ephemera. My story was more in pictures than words. It is a reminder to me that what I do today will allow me more travel in the future. This in my opinion will improve my tomorrow.


I got my images from 7gypsies American Vintage line using both papers, from the 8x8 pad and pieces from the Mini Ephemera pack. After assembling them in groups with a bit of glue stick, machine stitching was added. These pieces were adhered to my background.
    

Using a hard foam piece let me add DecoArt Metallic Lustre in Copper specifically to the high points of the embossed area. This added a lot of texture. The final touches were to splash around some Glimmer Mist splatters and doodle around the edges of my art journal page. In the end I did add just a touch of paint to the Petaloo butterfly so it looks less stark on the spread. 


Here is a photo of my journal to this point. I learned the tip of cutting pages at different widths from Dyan Reveley. Adds another fun dimension to my project. Thanks to Words & Paintery for a fun challenge!

Sunday, February 7, 2016

Seth Apter Tag with Gelatos

I am designing a Gelatos by Faber-Castell class including some of my favorite things like Seth Apters new stamps which co-ordinate with his stencils. Very convenient and super cool. Gelatos are a creamy pigment stick that come in a chapstick type delivery system. They are luscious and can be used to create all types of art. Here is just a quick sample of using Gelatos to create a bold and water color look on a tag. Stay tuned for more fun with Gelatos!

Tuesday, February 2, 2016

Making Flowers With Resin

Hi Inky Friends! I have a technique post up on the Resin Craft Blog. We are making these fun flowers. 
Go check out how to make these as well as tips on how to use them!!! You can access the page here.http://resincrafts.blogspot.com/2016/02/envirotex-lite-resin-flower-fun.html

LinkWithin

Related Posts Plugin for WordPress, Blogger...