Hello Inky Friends, this week I am doubling up being "inspired by" Tracy Evans & using Eileen Hull's newest diecut the Pocket Notebook. Happy Mix Media Monday!! I love, love Tracy Evans stamps by AALL & Create & conveniently they are available through Topflight Stamps. I also love Tracy's style & have had the pleasure of seeing a lot of her projects live & in color when we were team mates on Eileen Hull's Inspiration Team.

I made this book using a few of Tracy's projects as my inspiration, with a few spins of my own. I could literally spend days making these inspired books!!!

It was hard to choose just a few projects to base mine on. Here are the links to the ones that inspired me directly. This Lucky Tag was one. I like sewing on my projects & so does Tracy, she also uses a very soft minimal palette on this project which will be a challenge for me!!!
 This Flower Stems card is what inspired the colors I chose. Really love that vellum too! Plus the stamps... love them!
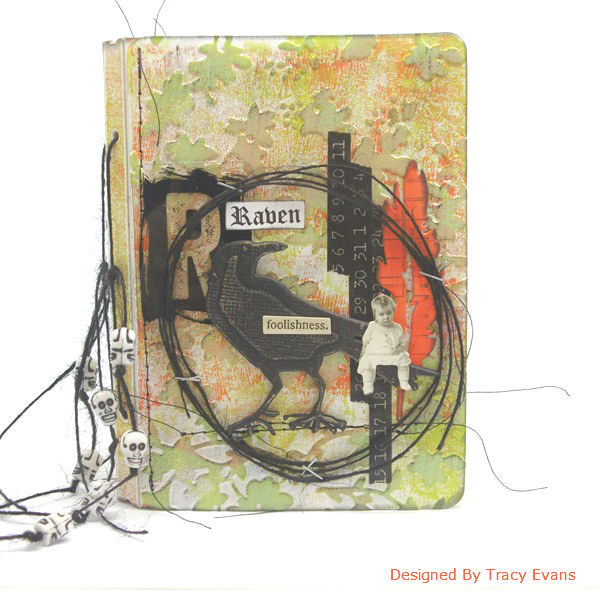
 This Raven Passport Book inspired my use of an embossing folder as the background, I also really love the placement of her ephemera on the front. Although I didn't end up going this route, hummmm maybe inspiration for the inside? Please take the time to go check out this super talented, lovely lady on her Craft Addicts blog. A lot of Tracy's stamps are available on the Topflight Stamps website.

It was hard to choose just a few projects to base mine on. Here are the links to the ones that inspired me directly. This Lucky Tag was one. I like sewing on my projects & so does Tracy, she also uses a very soft minimal palette on this project which will be a challenge for me!!!


Let's get started!! I began using mat board die cut with the Pocket Notebook die. This book size is fabulous with a spine that can be adjusted to almost any size up to 2" & if you wanted a bigger spine just cut 2 spines & attach them! Step 1 was to add the embossing, but the covers are bigger than the standard Sizzix embossing folder. To solve this problem simply emboss out of paper, tear & attach. I picked a few of my favorites so I was able to add multiple designs to my covers. This was glued down with 3D Gel to help the embossed areas remain strong. Any open areas were simply filled in with crackle paste & set to dry.


Next up color- I used a combo-ish that Tracy has been using lately. Fresco Finish paint in Mermaid, Amethyst, & Blueberry watered down & applied sparingly then wiping back with a baby wipe.

Next up time for some stamping, with Black Archival ink in random places using Tracy's stamp- #79- Bloom & Grow. I LOVE THIS STAMP!!! The arrows & heart are from another other set called Hearts.

Next up time for some stamping, with Black Archival ink in random places using Tracy's stamp- #79- Bloom & Grow. I LOVE THIS STAMP!!! The arrows & heart are from another other set called Hearts.

For my focal image a bouquet of hearts seemed a good idea. I stamped in archival ink just in case I wanted to add some ink, then sewed some sketchy lines leaving the threads long & messy.


I made a few extra to keep in my stash.


Last few steps were to arrange the hearts,& add some metal.

Here you can see part of the back with all that luscious texture. Join me back here next month where I will continue working on my book by adding the elastic & the start of the insides! Thanks so much for joining me, hope you have the chance to get inky today!

Here you can see part of the back with all that luscious texture. Join me back here next month where I will continue working on my book by adding the elastic & the start of the insides! Thanks so much for joining me, hope you have the chance to get inky today!
Supplies:
Tracy Evans stamps by AALL & Create- Feathered Bloom & Hearts
PaperArtsy Paint in Mermaid, Amethyst & Blueberry.
Eileen Hull Pocket Notebook by Sizzix
Eileen Hull Redline tape by Therm*O*Web
Metal by Prima Marketing
Archival Ink by Ranger in Black Soot, Cornflower Blue, Plum
Crackle Paste by Ranger


