Today is the Topflight Stamps 5th Birthday Blog Hop!! I was thrilled to be asked back to help them celebrate, so thank you Donna. If you haven't been over to the website, it is a great place to get those hard to order (especially with overseas shipping these days) companies that are based outside the USA. The supply list is below. Please hop along with us and see
all the beautiful talent from this group of amazing designers! You
should have arrived here from Erica Stranges's blog. If
not, no worries, catch the details below. *Unfortunately due to new tax laws and the USPS limiting
delivery areas Topflight Stamps is only able to ship to US and Canada right now.

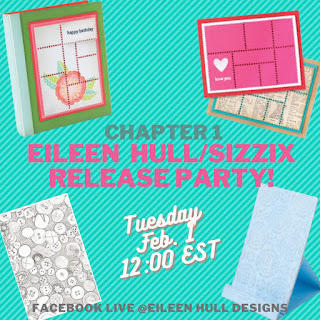
I decided to work with mainly Seth Apter products, one of my favorite designers & all around great guy. I really needed another phone stand plus these are so fun to make & very handy to have all over the house! They also make great gifts. The base of the stand is a Sizzix die cut by Eileen Hull.

GIVEAWAY DETAILS
Of
course, it wouldn’t be a birthday celebration without prizes!
Topflight Stamps is giving one lucky winner a $50 Gift Certificate to
the store. But wait, there is more, each stop on the hop has an
additional $25 Gift Certificate up for grabs for some lucky commenter.
For a chance to win, make sure to visit every stop on the hop and leave a
comment by April 3rd. Winners will be announced on the Topflight Stamps blog on April 7th. Good Luck!

How about a quick tutorial? I will also share some awesome Gel Press wipe up prints that came about as I was working. You will want to cut 1 base out of mat board for this project. It comes together really easily. Starting with Fresco Finish Paint & doing some wipe up to clean my press a bit. I like using a light color like Nougat, Vanilla or even a blue like Antarctic. If these colors are not available simply look for light colored paint. I brayered just a bit of light tone like Truffle on my board.

Here is the wipe up print. A wipe up print is when you take your dirty Gel Press that has dried paint on it. Add a layer of paint & put your paper down. The idea is you want the wet paint to dry on the paper & the layer of dry paint so it will pull up. Keep rubbing until the paper is not as cold 30 sec to a minute? Depending on the paint you are using.

You can lift up a corner to see if that dirty layer is being pulled up. Wait too long and the paper will stick to the plate. You can also just clean you plate with a baby wipe or hand sanitizer gel. Here is what my plate looked like after, there is still some paint there which can be cleaned up, sorry no before but you can see all the paint that is on the print. That was on my plate!

Next added some more color. You chose what colors you like to use. This was done just dabbing some color from the plate to the board.
I have 2 Gel Press videos which will show you how easy & fun it is to create pieces which can be used in other projects or added to the mat board before you cut out your shapes.

Now how about some stencil work. When using the press you will want to put your stencil face down so the letters are backwards. That way what ever you pull the letters will be in the right direction. Add the paint on top of the stencil, lift the stencil.

Press the board onto the stencil image in a few different places. This is one of my favorite Gel Press tricks. I show you how to do this in the video.

Here I am just building up the color adding Magic Moss paint from the press onto the board in different spots. Notice how it pushes the letter back a bit? Changes the color in spots. So fun! I am also pressing the 2 smaller pieces, you can see them in the upper right corner.

Here is my finished background. I also use the paint to stamp some images. Put a bit of paint on the plate, brayer it out & then dab the stamp in it. Stamp. Clean your stamp immediately with water & a rag or toothbrush. You don't want that paint to dry on your stamp.

I showed the paints I used, if Topflight Stamps doesn't have the one you want just substitute it. Don't be afraid to play around with your color palette. Here is a close up of the stand put together. Hot Tip: wait until you finish building the main cover area before you put it together LOL.

Alright time to add more stamping. I did this in 3 ways. #1 stamping on tissue paper with archival ink, then using a paint brush to tear the image out.

#2 was using embossing powder. Seth has 2 new trios out & I got my hands on one of them. Welcome to the family Just Deserts. I love swatching new colors, really helps when I go to design.

I also swatched some Prism Inks. These were all done using French Toast. The original color is underneath- Wow see how this expands your color choices?!
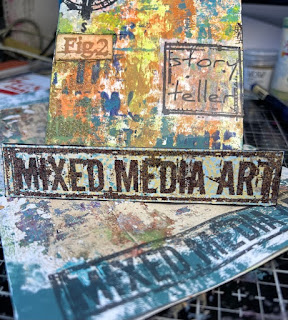
Adding the title Mixed Media using Mud Pie embossing. While I was working also added some images to those wipe up prints for art journal use. You can also see the tissue paper stamped with story teller. Love this set so many great images.

To finish & protect the surface of the stand I used a varnish. If you like a matt finish you can go with Cosmic Shimmer. I like gloss so I used Liquetex Gloss Medium & Varnish. It starts out milky but dries super clear & glossy. Hot Tip: Make sure your tissue paper images stay down, you may need to smooth out any bubbles that are created. Also if you board bows a bit don't worry it will be fine when dry & you can gentle bend it into submission LOL.

Last here is my phone on the stand. Makes for such convenience. With so much of our lives on our phone having this mixed media stand just makes me happy!!! I hope you have a chance to get inky today. Make sure to check out the other makers & Happy Birthday Topflight!!
Follow along here and if you get lost you can always start at the Topflight Stamps Blog.
GIVEAWAY DETAILS
Of course, it wouldn’t be a birthday celebration without prizes! Topflight Stamps is giving one lucky winner a $50 Gift Certificate to the store. But wait, there is more, each stop on the hop has an additional $25 Gift Certificate up for grabs for some lucky commenter. For a chance to win, make sure to visit every stop on the hop and leave a comment by April 3rd. Winners will be announced on the Topflight Stamps blog on April 7th. Good Luck!
Supplies:
- Seth Apter Stamps By PaperArtsy ESA 13, ESA 27, ESA 28
- Seth Apter Just Deserts Embossing Trio by Wow
- Sara Naumann Stencil by PaperArtsy PS297
- Fresco Finish Paint "
- Prism Ink
- Gel Press
- Cosmic Shimmer Matt Varnish
- Eileen Hull Phone Stand by Sizzix
- Mat Board
- Archival Ink