Showing posts with label heat emboss. Show all posts

Tuesday, May 3, 2022

Eileen Hull Shadow Box with 49th & Market.

 Hello Eileen Hull fans, it is time for the start of a new month which brings about a new theme. 1st can I say... how the heck is it MAY???? Our theme for the month is Birds, Nests & Eggs. You can play along in the Eileen Hull Fan Club Facebook group. Hope to see you there. *Affiliate- some of these companies have given me product to use, play & experiment with. The ideas are my own but I tend to work with companies whose products I like so enjoy the inspiration.  **some of these links are affiliate, I receive a small percentage from the company at no cost to you. This helps me deliver free content!

Here is one of the latest die cuts called Shadowbox Frame #2. I used 49th & Market paper which is really nice & sturdy and makes for a great frame. The collection is called Vintage Artistry, Hike More. It is harder to find as they these papers to sell out pretty quickly. You can find the link below & an alternate suggestion. 

I wanted to make the paper be directional & have some control over which elements showed on the front side. Therefore started by cutting a piece of clear acetate & marked the lines with a sharpie. Then made a diagram that showed which piece would be left side vrs. right side etc. 

You can see from this photo that in order for the frame to fit together you want the diagonal, with the tab portion facing inside and matched with a straight side end. Before I adhered the individual piece I cut out the butterfly & flower, using a kraft knife on a mat. Put a strong wet glue like Art Glitter Glue or Ultrabond on the inside of the tab & inside edge of that piece. Push the square into the space, the tab will fold as you do. Below is a video, which Eileen made.

If you want to see how the frame is put together Eileen shows you at the 12:05 minute mark. You can also watch the whole video to see the entire release! Hot Tip: Use a scoreboard or another tool that has a 90 degree edge so you can use it as a guide to keep the pieces square as you assemble. 

Once my frame was dry & nicely set up I measured the background paper & a piece of card board, cut and adhered to the back. This gives the frame more stability. Here is an example using different paper. You can cover both sides of the card board to create a nice backside piece.

Time to decorate! I cut out one of the houses from the Elements set using wood grain paper & covered it in clear embossing powder.  The door was embossed with Crackling Campfire Glaze, and glued in after.

This was adhered along with the picket fence from the same set. Also some ephemera from 49th & Market. 

Hot Tip: Take a piece of mat board & adhere a pixie dot to it. Pixie dots are a removable glue dot that will hold your paper but not tear the delicate die cut. That way you can heat emboss without using tweezers & having to touch your piece up.
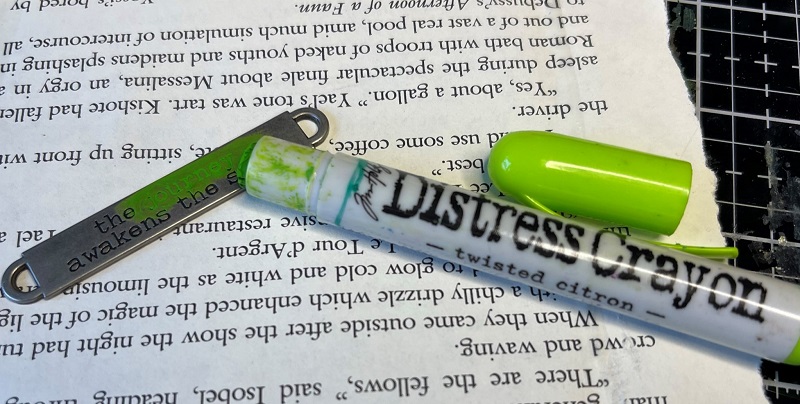
I wanted my metal title which is a word band, to show up. It was colored with Distress Crayon and adhered using Redline Tape. 

The top of my box was finished with some washi tape, this helped cover the holes made from cutting the images on the front. I also added a handle just for fun. 
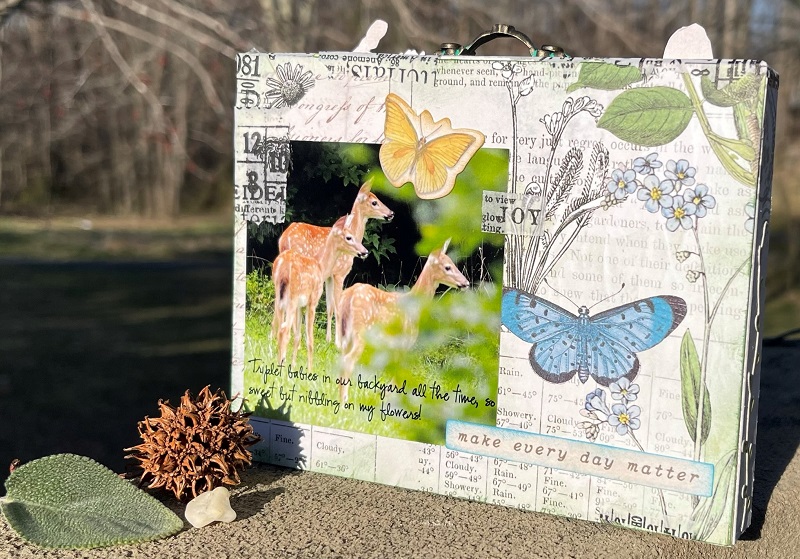
The last step was to decorate the backside as well. Now my frame can be displayed on a table & be happy looking, from both sides. Bonus: I have a lovely table decor item that reminds me of my friendly hummingbirds! I hope you have the chance to make one of these cool shadow boxes, they are a touch addicting and also make great gifts. Be sure to check out the other projects that my teammates are making, & check back throughout the month. Have a great day!

Supplies:

Monday, December 7, 2020

Snow Day Card for December Daily

Happy December, today I am making a snow day themed card for my December Daily. The theme this week at Topflight Stamps is "Snow" so be sure to tune in & see what my teamies have planned! Christmas is a busy month but I really want to be able to squeeze in some relaxing, quick items for my album. Remember if you use the code karenbearse you save 10%!  *Affiliate- some of these companies have given me product to use, play & experiment with. The ideas are my own but I tend to work with companies whose products I like so enjoy the inspiration.  **some of these links are affiliate, I receive a small percentage from the company at no cost to you. This helps me deliver free content!

Here is my mixed media page made simple, with a few short cuts. I love that this page is sitting in my book just waiting for the photo or a journaling spot ready for that day. If we don't get snow I can make my page about the fact that there was no snow this season!  

 Step 1: to make this page super quick I used a few of Art By Marlene's products, letter stamps by Tracy Evans, & snowflake background stamp which is a must have. To start, simply cut a piece of card stock either for a card or to fit in your album. I made mine 8.25" x 4". Then I cut a piece of collage paper a .25" smaller. The collage paper is fairly thin so you will want that card stock backing for sure. I will be able to put this in a pocket or punch holes & add it as a skinny page element in my album.


For the title I used a stamp platform so I could easily line up my letters. This way it I can see where the image will be on the paper & if a letter doesn't stamp correctly easily fix it. 


For decoration I used a die cut out of the Paper Elements Pack & a quote from the Sticky Quotes by Art By Marlene. 

Lastly the snowflakes were heat embossed using Mermaid fin. Love how it glitters when it catches the light. If you wanted the snowflakes to be more prominent using a white or silver emboss would work great. That's it for today! Thanks for joining me & I hope you have a chance to get inky!

Supplies:

Thursday, November 9, 2017

Let's Make a Coffee Tag!

Hello Stamping fans, I am here with my Thursday Topflight Stamps blog post & today is all about this funky, grungy coffee tag. 


 Tag You're It!

This tag came about quite quickly & just makes me happy! I played with Distress Oxide Ink & embossing powder so how about a tutorial?


1st up the stamps sets I used are by Darkroom Door. One of my favorite sets is called Coffee Time.


2nd set was a less obvious one to use but I love reaching for this set when I want to add some background stamping. It is called Grunge Marks. 


Let's Get Inky

Step 1: Using Distress Oxide simply put 3 colors on your craft mat. Spritz with water & drag your tag through the color, turn the tag in different directions & repeat this just a few times until the tag is almost covered.


Dry that first layer & add some of the left over splats by tapping your tag into wet color picking up a little bit of different color then the base color. For example in the yellow areas tap in brown etc. 

Using the same colors stamp some background images randomly around the tag. Let some of the images hang off sides to create more interest. 


Coffee Is The Cure for Cranky!

Step 2: I used a Gel Press paper from my stash to create my coffee cup. Simply heat emboss your image using emboss ink & a sparkle emboss powder. Cut the image out.


I also used the coffee beans in the same way to act as the steam coming up from the cup. Make sure the background of your tag is dry before embossing or the powder will stick to your background images. 

Time for Assembly.

Step 3: Stamp the quote on a piece of card stock, cut out & distress the edges. Adhere to the cup. 


Add the other images on the tag. I love using these paper dolls & like to create stories from my life for them. I made my cup into a pocket & cut out a tag for a journal spot. Well that is it for today!

I will be entering this tag in the Craft Stamper Magazine challenge.  I hope you get a chance to play today.

LinkWithin

Related Posts Plugin for WordPress, Blogger...