Hi Arty Friends,
I was starring at a blank piece of paper wondering what to do for my Topflight Stamps blog post when it came to me. Crackle Paste. Yup that one thought, as I had nothing else to go on I went with it. Let's see where it led me. *Affiliate- some of these companies have given me product to use, play & experiment with. The ideas are my own but I tend to work with companies whose products I like so enjoy the inspiration. **some of these links are affiliate, I receive a small percentage from the company at no cost to you. This helps me deliver free content!
This is my finished art journal page. I so miss the ocean & going to the beach. We try to go every summer but the summer of 2019 we only got 1 1/2 days in. Little did we know that covid was going to come hammering down. Creating a beach drought so to speak.
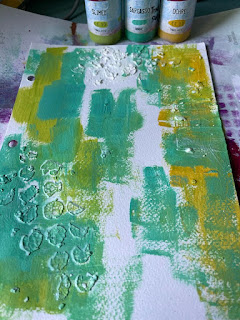
I started with a stencil & the crackle paste, simply scrape some on with a palette knife. My paste is kinda old & didn't go on well. I added some water to see if that would help. While that was drying I pulled out some Fresco Finish paint.
Added some paint to get some color down, just with a dry brush. Some of the paste peeled off as I was laying down the color.
Hum let's see if we can try a solution to the peeling crackle paste. I did a second round of the paste but 1st added a layer of decoupage glue, while it was still wet did another round of the crackle paste through a stencil. My thought was when the glue dried it would stick the paste to the paper. I also added more water & stirred the paste up, it also was a closer consistency to fresh paste but I thought the crackles might be lost in the process.
While that was drying the focal image was stamped on card stock, & cut out. It is a Stamperia set called Octopus. The backing of these stamps is very different so they are flexible and do not adhere to an acrylic block. Simply run a bit of adhesive on a block if you want to use it that way. I also stamped the quote in French Navy ink. Some random stamping in Thundercloud with the background image from the same set was next. It just adds a bit of interest.
Next up was some seaweed courtesy of the Lavinia, Sea Flower. It was stamped in Rainforest Green, Ocean Spray & Cinnamon Swirl. It didn't show up as well as I liked. So the image was re-stamped in French Navy. That worked well & made it look like a field of seaweed with the lighter images creating depth.
The glue under the paste tricked worked with the newer image staying put nicely. Even with the water added there was still a lot of crackle effect so that was a nice surprise.
Added a bit of washi tape, always good to add a pattern.
Next up was some stencil work with some acrylic paint. Used Pixie Spray to help the stencil stick to the card stock while I worked.
With a paint brush & some warm colors I painted inside the stencil.
Before the shapes were cut up some random stamping was added. Once dry the shapes were cut out & doodled around. The nice thing about this technique is you don't have to be good at drawing to make something cool! In hind sight the doodling should have been done after the circles had been adhered.
All that was left was assembly. I put the pieces together and this is what I came up with. The following night I woke up in the early morning with the idea that the bubbles were not great & what I needed were fish!
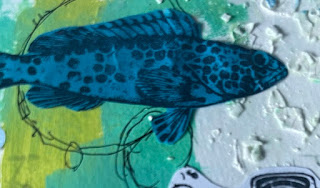
Back to the drawing board! Painted on a piece of deli paper with random blue Fresco Finish. A color similar to China, Blueberry & South Pacific I did 3 spots of plain color & then one big swatch mixing the colors using a dry brush.
Then I added some fish from the PaperArtsy set ESC10. It may be out of stock but there are plenty of fish stamps if you go here. The deli paper fish gave the journal page a bit of something extra. Well that is it for this week. I hope you give this tutorial a try & play along.
Supplies:
- Sea World Octopus stamp set by Stamperia
- Sea Flower by Lavinia
- Prism Ink- Cinnamon Swirl, Ocean Spray, French Navy, Rainforest Green
- Fresco Finish Paint- Slimed, Sargasso, Smoked Paprika, Cerise, Byzantine
- Stencils by PaperArtsy- Various Circles, Textures, & PS249
- Washi Tape by AALL & Create
- AALL & Create-#115 Chess Art
- A Journal such as this Art By Marlene 8x8
- Therm*o*web Pixie Spray.


No comments:
Post a Comment