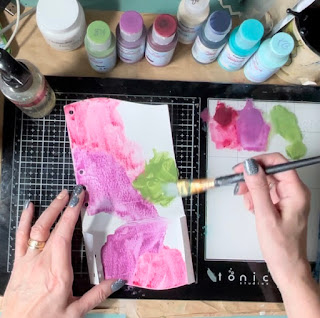
Hello Topflight Stamps Fans, I am working on a Mixed Media planner page today. These techniques could also be used for a card, an art journal page or canvas. I will probably use this in my December Daily as a start to the New Year. *Affiliate- some of these companies have given me product to use, play & experiment with. The ideas are my own but I tend to work with companies whose products I like so enjoy the inspiration. **some of these links are affiliate, I receive a small percentage from the company at no cost to you. This helps me deliver free content!
This page has multiple layers that add up to a lot of eye candy. I used PaperArtsy products, Seth Apter stamps & embossing powder. It was so nice to just sit down and get ink on my hands.
Let's get started
Layer #1: Layers of paint. Using watercolor paper that was then covered with a layer of gesso. You could also use card stock. I cut my page using Elizabeth Crafts Designs Planner Essentials. A supply list with links is at the end of this post. Also if you use my code karenbearse on the Topflight Stamps site you save 10%.
Layer 2: The idea is to do a layer of paint & then wipe away some of the colors with a stencil pattern. The gesso is what makes this technique work. Using Fresco Finish paint do a watercolor type background. Dry the paint a bit but you still want it kind of wet. Place your stencil down & use a baby wipe to pull off some of the paint.
Practice this technique on scrap papers 1st until you get the hang of it. I just wanted a sketchy look so I wasn't too careful pulling the paint up.
Layer 3: Next add layers of paint with stamps. Be sure to wash the paint off your stamps right after to protect your stamps.
Layer 4: Add some embossed stamped images. In this case I used 1 of each of the colors in Seth Apter's trio set, using his circle stamp. They turned out so cool!
Layer 5: The title was from the same set. I really like Seth's last release for this reason. It includes background, focal & title stamps all in one set. The word now was heat embossed with Crusty Copper, one of my go to embossing colors. It was stamped on a bit of patterned book paper & then cut out.
Layer 6: This title was covered in clear emboss using Glistening Glass & heat set. I did not get the emboss uniformly on the edges. To achieve this look don't press the embossing ink perfectly at the edges. The powder won't adhere in those spots. Once cool the edges were distress with ink. The color hits the paper but wipes off easily where the embossing is. This piece was mounted on black card stock to help it pop & give it some stability. It was adhered to the background with foam pad adhesive.
Layer 7: Add a quote. I love Art by Marlene's quote stickers there is one for almost every occasion! A it of doodling & my page is done! Thanks so much for joining me today, I hope I could inspire you to get some art done.
Supplies:
- Fresco Finish Paint by PaperArtsy
- Seth Apter stamps ESA15 by PaperArtsy
- " " Cosmo & Metalz Trio embossing powder by WOW
- Gesso
- Prism Ink in Peacock Green
- 3-D Foam adhesive
- Doubled sided adhesive.
- Art By Marlene Quote Stickers
- Elizabeth Craft Designs Planner Essentials 30


The texture on the cover is amazing.....I was zooming in! Lots of inspiration!
ReplyDelete