Welcome to my tutorial on my Eileen Hull Frame Pocket Journal by Sizzix! It was so exciting to work with this multi functional die! You can make a journal, a box (with extra pieces) a double pocket book, or a combination. This month the teams are working with the theme "love of journaling or Valentine type love". *Affiliate- some of these companies have given me product to use, play & experiment with. The ideas are my own but I tend to work with companies whose products I like so enjoy the inspiration. **some of these links are affiliate, I receive a small percentage from the company at no cost to you. This helps me deliver free content!
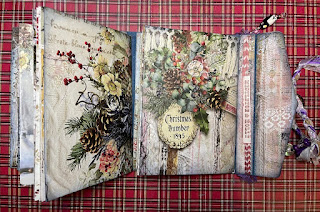
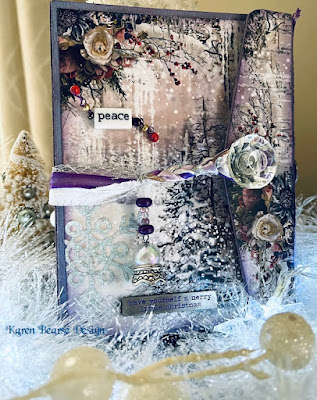
Perfect timing for me to showcase my love of all things journal. This has a very cool aspect as I put in 2 signatures that open like a gate fold album. This allowed me to still have the big sturdy frame pocket on the front inside of the book. I also added half of a snowflake on the front. It is cut & then embossed in a white glittery embossing powder. Supply list is at the end.
For a flip thorough of this book you can check out Eileen Hull You Tube Live. The flip through with some explanation of the book is at the 19 minute mark. I also carry on & show my other projects for Chapter 1 release as well as a demo if you want to stick around and watch! There is also the usual chatter and shenanigans.
Step 1: Let's cut the material for the book. I used card board for this. As I will be layering with a good quality scrapbook paper the card board does not need to be too stiff. Cut 2 pieces of the cover and 1 fold over part as shown above. Adhere Redline Tape on the furthest edges of the covers.
Assemble the pieces. As you see above the 1st book cover spine piece attaches to the cover of the 2nd book. The flap attaches to the spine of the 2nd book cover. the possibilities for this book are a lot!
Step 2: Let's make the outside cover. Paint the edges that will not be covered with paper. Here you see a combination of Dusty Concord Distress Oxide & Stain Sprays. If you don't want purple Aged Mahogany would work beautifully or Silver. The paper was cut to fit the covers- the easiest way to do this is mark your paper with pencil. That way you can also position to get the best part of the paper. I used the gorgeous paper line by Blue Fern for this.
Step 3: Take the pocket piece & paint the edges that will show, not the tab part. I used Uncharted Mariner for this as it matched the inside paper really well. I also painted the spines in this color.
Step 4: Adhere the pocket by putting Redline on the tabs. You can easily see how the pocket folds from the scor lines. The insides are more of the same paper line, it is so gorgeous!! You can see from this angle how the pocket has room for many tags, or ephemera or even a booklet. It is almost 1/2" wide.
Step 5: This is how the book is shaping up. I added silver 1mm elastic on 2 sections of the spine. The furthest set of holes on the 1st spine and the closest set on the 2nd spine. This is important as it allows the signatures to fit even with the dimensional pocket, which takes up space. You can also see I added the front closure. I used one of Tim Holtz Curio Knobs. Just punch a hole in the flap portion and then screw it together. You want to do this before you add the paper to hide the backside.
Step 6: Use the finished flap & mark on the backside of the paper, then cut out. I painted the spine above before adhering the paper.
Step 7: Add in more paper on the inside covers. I also cut a small strip of paper to cover the holes in the spine that are not being used.
Step 8, 9 & 10: Finish off the front side. I added paper on one spine to cover the unused holes & a piece of lace on the other. The lace was dyed using Dusty Concord Oxide. Charms & a word plaque was added with some ribbon. This is a pic of the finished project so you can see how I added the Bohemian Ribbon Closure & charms. The little bird is from the Wreathe & Snowflake die cut set.
Step 11: Add in your booklets. I made mine with paper from the paper line. You can see the 1st booklet on the left side & the 2nd booklet on the right. The 1st booklet will lie on top of the 2nd when the book is closed.
If you are part of the Eileen Hull Fan Club you can see how I make a Bohemian Ribbon Closure in the video. The tutorial starts at the 8:17 min mark-ish. If you are not a member please join there are a zillion videos in there using Eileen's die-cut with sooooo much inspiration. It is a great group to hang out in. Thanks for joining me today. I hope you have time to play!!
Supply List:
- Eileen Hull Frame Pocket Journal by Sizzix
- " " Wreath & Snowflake die "
- Distress Paint by Ranger Ink
- Distress Stain & Oxide Spray by Ranger Ink
- Redline Tape 1/4"
- Ultrabond Glue (adds stability).
- Blue Fern Mistletoe & Holly Paper by Jen Bishop
- Tim Holtz Curio Knobs by Ideaology
- " " Metal Word Bands " "


