Playing with the Eileen Hull Journal die is just way too much fun. *this post is from 2017 & has been updated with new supplies as some of the supplies listed have been discontinued- see supply list at end of post*
This month the design team are focusing on it & the new Heart Felt collection that is shipping to stores now. Today I am back with a Gardeners Journal. I am also happy to be playing with Eileen's Color Blends inks using the Utee emboss technique. I am loving this technique & trying to work it out of my system!
*Affiliate- some of these companies have given me product to use, play & experiment with. The ideas are my own but I tend to work with companies whose products I like so enjoy the inspiration. **some of these links are affiliate, I receive a small percentage from the company at no cost to you. This helps me deliver free content!
 |
| A Gardner's Journal Covered in Color Blends Ink |
You Can Never Have Too Many Journals.
I am learning this is very true as I just can't stop making them!!! My Flower journal is for my garden. I have a bad habit of planting things, forgetting where I planted them & then weeding my new flowers the following spring. Last spring, for example I weeded 3 beautiful phlox plants. Most sad & annoying. To prevent that I started taking pictures of my flower beds at various stages during the growing season so I know where things are planted. All I need is a book to put the info in. Of course the book needs to be pretty & filled with tags, beautiful scrapbook paper & inky. This is definitely just the base of the book, one of the great things about making these books is they can be added to as needed.
Well as the original "black thumb of doom" I was a killer of all things green. Could not keep plants alive but the weeds would thrive. In my book which will contain this quote I will put a pic of me weeding, or maybe put a picture of my garden full of lush, healthy flowers! I refuse to let the weeds, squirrels or slugs win!!!
 |
| Embossing Folders work great on mat board. |
Let's Make A Journal!
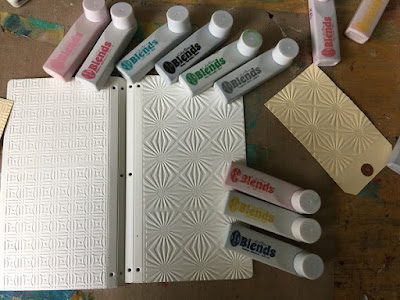
Start with Eileen's Journal die which should be hitting stores in the next few weeks. Add mat board & make 2 cuts. Using Eileen's embossing folders emboss the mat board. The cover is larger than the folder so run it through 2x aligning the pattern as closely as possible. You will end up with a line where the folders overlap which can't be avoided. In retrospect this line wouldn't be noticeable by the time all the inking is done. I opted to emboss tags to cover the overlap.
 |
| Use Color Blends to ink up the covers, so many pretty colors! |
How About Some Color?
Using Color Blends simply color the cover. I first tested the colors on a piece of paper, mixing a few of the blends until I got the colors I wanted. You can also add a bit of water & blend with a paint brush. Remember to do the inside spine & inside edges. For more info on how to use color blends go here.
 |
| Emboss your tags & color them with shimmery Glimmer Mist. |
I wanted some shimmer on the tags, using Glimmer Mists made this quick & easy.
 |
| Use metal acrylic paint to add hits of color to the embossed images, makes it pop. |
Next was to add in the lavender color for the challenge. I wanted to use a heavier medium so I went with acrylic paint. Started with a metallic purple, adding in pearl to get a lighter lavender color. Keeping with the shimmer idea blending in ice crystal turns the paint glittery. With a small amount of paint on the hard foam dabber, swipe paint just hitting the high points.
 |
| Close up of the UTEE & Charred Gold embossing. |
Time For The UTEE Emboss Technique.
Add the tags to the journal lining up the emboss pattern, adhere with a strong glue. Instead of emboss dabber I used a colorless mica spray. This makes it much easier to work on a large area & adds wonderful shimmer. I did half a cover at a time to prevent the mica spray drying & UTEE flying off. I just did a post on how to do this technique so you can get the directions here. I did jazz this up a bit by sprinkling some Charred Gold emboss powder in spots to add a little grunge. Once the UTEE is hot & melting just sprinkle another color of emboss & continue to heat until powders are melted. Continue until both covers are nice & embossed. If you miss spots go back in with the emboss dabber & UTEE until nice coverage is achieved.
 |
| Look at all the pretty beads! |
Assembly Could Be The Best Part!
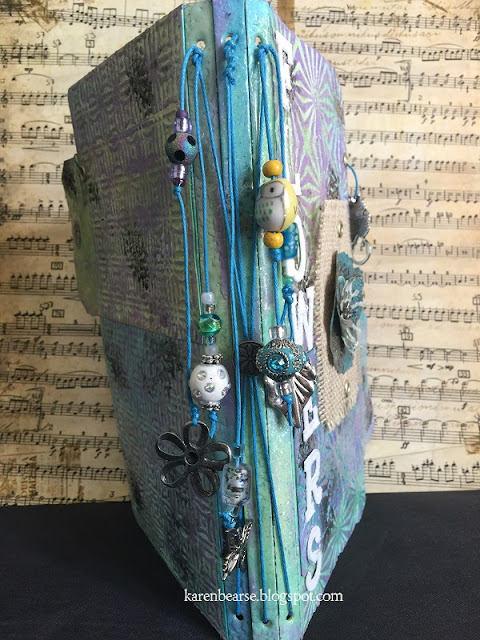
Add a good strong glue to the inside of the front cover piece on the outer edge. Take the 2 pieces and put the spine together so the center hole matches up, you can see how my front cover lies on top of the back cover in the center of the spine. For this book I ran hemp down each section tying my thread off at the outside top of my book. I added beads and charms cause I can't stop doing my spines like this.
 |
| Let's make a cool grungy, patina flower with emboss. |
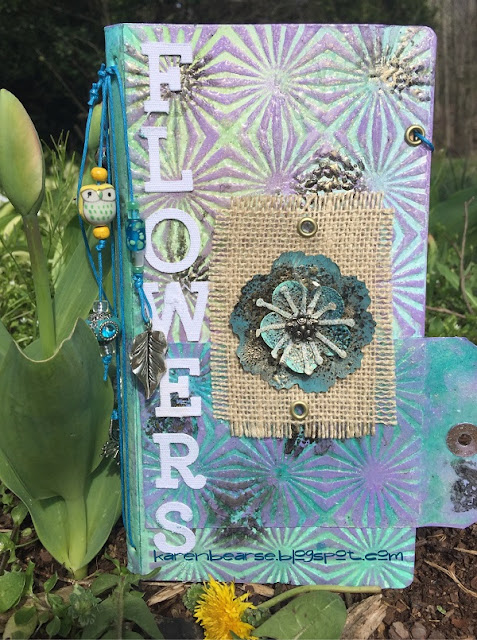
I cut a couple of flower pieces from Eileen's new "Stitchy Flowers & Leaf" Thinlets die. I used book paper but ended up covering it completely. Heat emboss the 2 flower pieces, everything but the edges, with Weathered Gold. Once the powder was set I distressed it with the Color Blends that were used on the cover. It ended up looking like a patina, was kind of a lucky accident. The middle part or stamens could be embossed with a color like Raspberry Ice Cream to add some fun.
 |
| Some close ups for you! |
Here is my flower assembled for the front cover. Simply layered it & added a brad on burlap with a few eyelets. Simple but looks pretty cool. On the right another pic of the spine of the book. I decided to add a brad in the center hole to cover it up. This hole can be used to thread an elastic or ribbon through it to create a tie for the book. That's it for now, this post has gotten long so I will do another one on the inside of the book. Stay tuned!!
To check out my team mates fabulous creations you can check out the blog post here.
Supplies:
- Eileen Hull dies by Sizzix- Journal, Stitchy Flowers & Leaf is discontinued but you might like this set Funky Foliage plus bonus there are mushrooms!!
- " embossing folders are discontinued but there are so many options here.
- - mat board
- Eileen's Colorblends have been discontinue but you can use the re-inkers & a foamie - Bay, Beach, Hydrangea, Leaf or substitute Distress Ink for the same results.
- Seth Apter has an awesome Embossing Powder Trio that will do the job.
- Raspberry Ice Cream Emboss has white with red & blue crystals.
- Canvas Corp- Glimmer Mist in Key Lime Pie & Peacock Chalk- if still available
- or you can sub Distress Spray in Cracked Pistachio & Twisted Citron
- Canvas Corp Brands- Burlap
- DecoArt- Metallic in Pearl, Purple Pearl, Ice Crystal Glamour Dust
- Ranger- UTEE (ultra thick embossing powder) Tags
- Thermoweb- Sticky tape runner, Ultra Bond Glue
- Blue Moon Beads, Hemp, letters from stash.


What a beautiful journal Karen! Love the colors and the great texture added with the embossing! The charms hung on the binding are so sweet! Julia xx
ReplyDeleteThank you so much Julia! I can't stop using this die!
DeleteKaren this is such a fantastic idea and housed in such a beautiful way! love what you did in creating the texture.... and all the amazing products used to create a masterpiece..... xo
ReplyDeleteThank you Diana glad you like it!
Deletesuper cool Karen!!!
ReplyDeleteThanks Lisa!
Deletewhat a lovely journal. thanks so much for sharing,
ReplyDeleteThanks for stopping by Theresa!
DeleteLovely journal. Love the deep embossing and that lovely lilac/purple. Lovely bead embellishments too. Tracy x
ReplyDeleteThanks so much Tracy!
DeleteThat's very beautiful!
ReplyDeleteThank you!!
DeleteAwesome project and post! Love the beads on the binding elastic and the UTEE trick is quite cool- will have to "borrow" it :-) Such a cool journal- unfortunately I am another black thumb :-(
ReplyDeletethx Eileen!!! I can't stop using the beads!
DeleteThis comment has been removed by the author.
ReplyDeleteGorgeous Karen, love all the extra details you have included. Gardening themes seem popular - that's my next one lol.
ReplyDeletehugs Brenda xxx
Thanks so much Brenda!! I am hoping to find time to work on the inside of it!!
ReplyDelete